Deploy a Reverse Proxy with Nginx on a Raspberry Pi - Blog AstronautMarkus

"Learn how to set up a reverse proxy using Nginx on a Raspberry Pi. This guide covers installation, configuration, and enabling HTTPS with Let's Encrypt, allowing you to manage multiple web services securely on your local network."
Published: November 30, 2025
Deploy a Reverse Proxy on your network using Nginx on a Raspberry Pi
Welcome to this post, where we’ll explain how to create a basic configuration of an Nginx server acting as a reverse proxy on a Raspberry Pi. This configuration is useful for managing multiple web services on a local network, allowing requests to be directed to a specific server based on the requested URL.
What is a Reverse Proxy?
A reverse proxy is a server that receives requests from clients and forwards them to one or more backend servers. Unlike a forward proxy, which acts on behalf of the client, a reverse proxy acts on behalf of the server. This is useful for load distribution, improving security, and managing multiple web services.
Network Scenario Example
Imagine the following situation:
- Your internet service provider (ISP) assigns you the public IP address:
203.0.113.1 - In your local network you have several servers:
- Server 1:
192.168.1.101 - Server 2:
192.168.1.102 - Raspberry Pi (with Nginx):
192.168.1.100(the only IP visible from the internet)
- Server 1:
Now, you want:
- When you access
http://website1.example.com, the request is directed to Server 1 (192.168.1.101). - When you access
http://website2.example.com, the request is directed to Server 2 (192.168.1.102).
The Raspberry Pi will act as an intermediary, receiving all external requests and, thanks to Nginx, redirecting them to the corresponding server based on the requested domain.
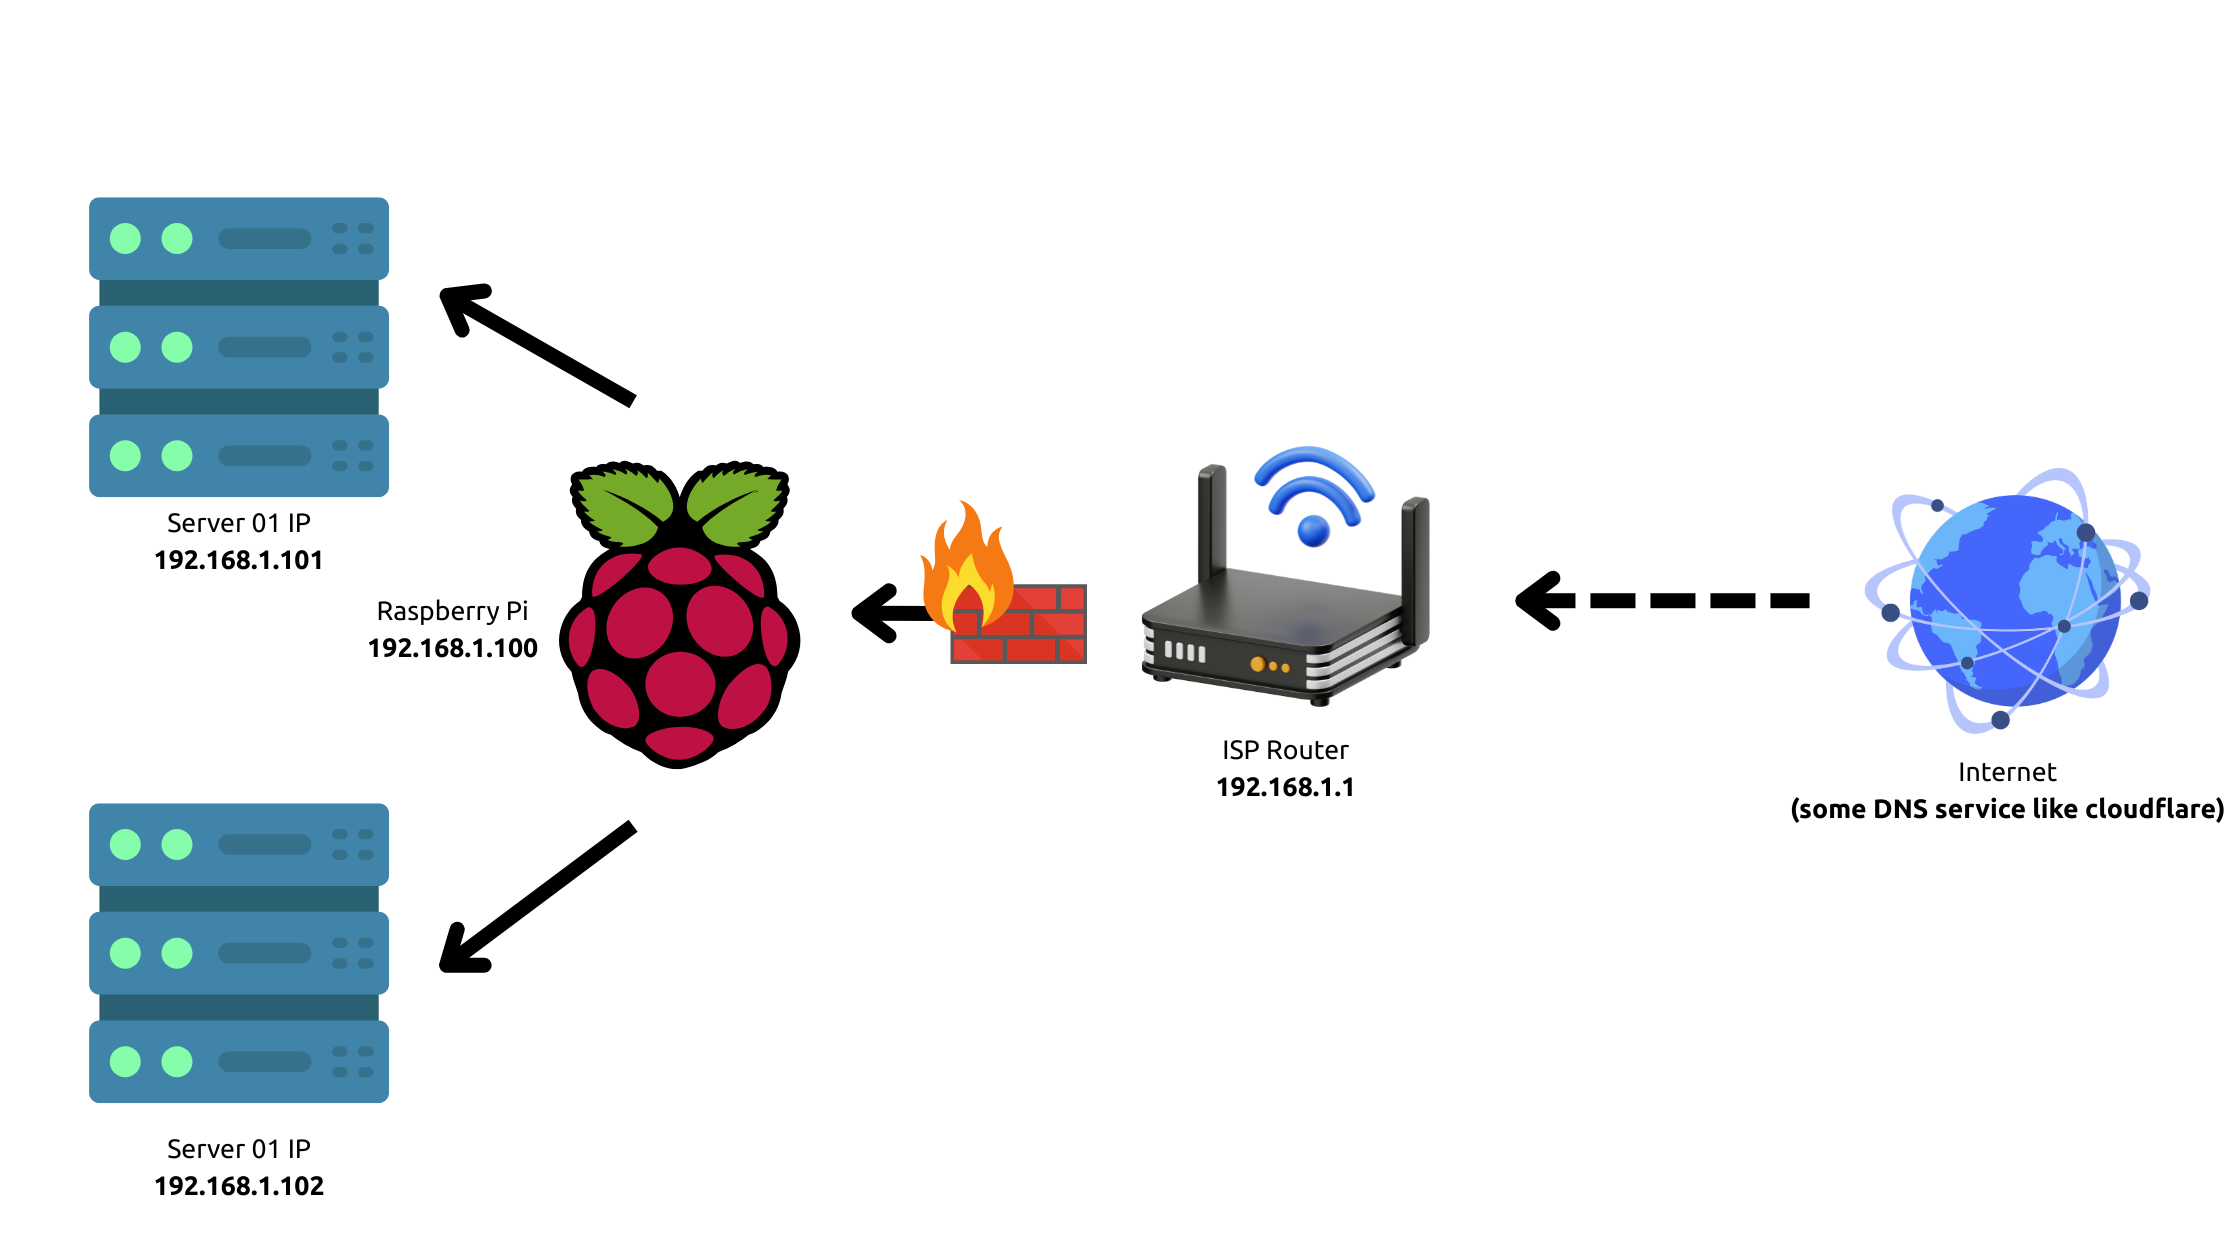
This image illustrates how requests are directed through the reverse proxy on the Raspberry Pi, redirecting to the first or second server depending on the requested URL.
Note: For this to work, you must have configured your
DNS service, e.g., Cloudflareso thatwebsite1.example.comandwebsite2.example.compoint to the public IP203.0.113.1, which is your ISP’s IP. After that, redirect all HTTP/HTTPS requests to the Raspberry Pi (192.168.1.100) from your router, usingDMZorport forwardingrules.
Prerequisites
- Raspberry Pi: Any recent model should work, at least 1GB of RAM for acceptable performance.
- Distribution of choice: For this example we’ll use
Raspberry Pi OSbased onDebian 12. - Terminal access: Either directly or via
SSH. - Nginx installed: Web server that will act as reverse proxy. We’ll explain how to install it below.
- One or more servers: Apart from the Raspberry Pi, you’ll need at least one other machine to act as a
backendserver. It can be another Raspberry Pi, a local server, or any computer on the same network. - nano or vim: A text editor to modify configuration files.
- Certbot (optional): Tool to obtain free SSL certificates from Let’s Encrypt.
1.0 Requirements Installation
If you already have Nginx installed, you can skip the installation section.
1.1 Nginx Installation
To install Nginx on your Raspberry Pi, open a terminal and run the following commands:
sudo apt update
sudo apt install nginx
1.2 Enable Nginx
To enable Nginx on your Raspberry Pi, run the following command:
sudo systemctl enable --now nginxOnce this is done, when entering the local IP address of the Raspberry Pi, in our example http://192.168.1.100 if everything went well, we’ll see a screen with an Nginx welcome message like the following image:
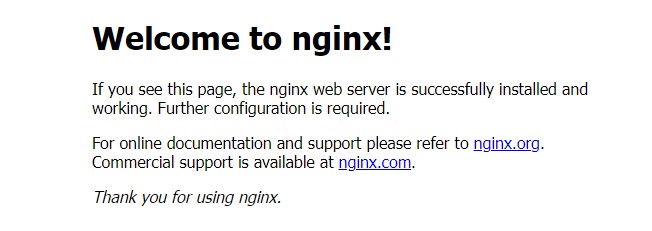
With this we have Nginx ready for the Reverse Proxy, now we can replicate this same procedure on the rest of the servers or machines, the installation process is the same for all machines in our configuration, we just need to make sure they can communicate with each other, or that ports 80/443 are open.
Note: Make sure there are no other services using ports 80/443 on the Raspberry Pi or other servers, other than Nginx to avoid conflicts.
1.3 Verify communication between servers
If you want to make sure your machines can “talk to each other”, you can run the following command from your Raspberry Pi:
ping 192.168.1.101 // Example server 1
ping 192.168.1.102 // Example server 2
If everything goes well, you should receive responses from each of the servers, indicating they can communicate with each other.
PING 192.168.1.101 (192.168.1.101) 56(84) bytes of data.
64 bytes from 192.168.1.101: icmp_seq=1 ttl=64 time=0.145 ms
64 bytes from 192.168.1.101: icmp_seq=2 ttl=64 time=0.190 ms
64 bytes from 192.168.1.101: icmp_seq=3 ttl=64 time=0.234 ms
64 bytes from 192.168.1.101: icmp_seq=4 ttl=64 time=0.210 ms

--- 192.168.1.101 ping statistics ---
4 packets transmitted, 4 received, 0% packet loss, time 3032ms
rtt min/avg/max/mdev = 0.145/0.195/0.234/0.033 ms
Something like this should appear, not necessarily identical, the important thing is that you receive responses from all servers. You can also do the process in reverse, running pings from the other servers to the Raspberry Pi, ideally bidirectional communication to avoid connectivity problems.
1.4 Using nano or vim
To edit configuration files on your Raspberry Pi, you can use text editors like nano or vim. Both are available in most Linux distributions.
If you’re not sure, you can run:
sudo apt install nano vimfor this example for simplicity, we’ll use nano, this is personal preference.
1.5 Install Certbot (optional)
If you want to enable HTTPS on your server, that is the green padlock that browsers show in the address bar, you can use Certbot to obtain a free SSL certificate from Let’s Encrypt.
To install Certbot, run the following commands:
sudo apt install certbot python3-certbot-nginxThis will install Certbot and the necessary dependencies for it to work with Nginx.
With this, we’ll have all the dependencies and verify communication between servers. Once these steps are completed, we can proceed to configure Nginx.
2.0 Nginx Configuration (Incoming server, Raspberry Pi)
To start with our Nginx configuration, we must create a configuration file for our entry server, or the Raspberry Pi, which will receive requests from our Router, that is, requests from visitors.
2.1 Create .conf file
We’re going to consider that our domain is example.com, for this example we’ll do two things. 1. Serve a front-end page to the URL http://example.com 2. We’ll set up an API or backend service for this same page, using a subdomain, http://api.example.com.
sudo nano /etc/nginx/sites-available/example.com.confNow, you can paste the following code in the terminal:
server {
    listen 80;
    server_name example.com;

    location / {
        proxy_pass http://192.168.1.101;
        proxy_set_header Host $host;
        proxy_set_header X-Real-IP $remote_addr;
        proxy_set_header X-Forwarded-For $proxy_add_x_forwarded_for;
        proxy_set_header X-Forwarded-Proto $scheme;
    }
}
This will make Nginx listen on port 80 and forward requests to the corresponding backend server’s IP address. Make sure the IP address and domain name are correct and properly configured in your network. In our example we said our domain was example.com and the backend server was at 192.168.1.101.
2.2 Create symbolic link (Debian-based distributions, Ubuntu, Raspberry Pi OS etc)
After creating the configuration file, we need to create a symbolic link in the sites-enabled directory so Nginx can use this configuration.
sudo ln -s /etc/nginx/sites-available/example.com.conf /etc/nginx/sites-enabled/Tip: If you’re already in
sites-available, don’t do ln -s directly to example.com.conf, do it with the full path, from /etc/nginx/sites-available/example.com.conf to /etc/nginx/sites-enabled/example.com.conf or it will give you an error.open() “/etc/nginx/example.com.conf” failed (40: Too many levels of symbolic links) Just in case.
Now, Nginx will take our configuration into account when restarting or reloading. First to confirm everything is fine, we can run the following command:
sudo nginx -tIf everything goes well, this should respond with something like:
nginx: the configuration file /etc/nginx/nginx.conf syntax is ok
nginx: configuration file /etc/nginx/nginx.conf test is successful
If there’s an error, check the configuration file to make sure there are no typos or syntax errors. They could also be other configurations in the main nginx.conf file, or some other file, be careful with that.
2.3 Restart Nginx
Finally, to apply the changes, restart Nginx with the following command:
sudo systemctl restart nginxNow, Nginx should be configured as a reverse proxy for the domain http://example.com, redirecting requests to the backend server at 192.168.1.101. You can repeat this process for each domain or subdomain you want to configure, making sure to change the backend server’s IP address as needed. In our case we’ll consider that the subdomain api.example.com points to 192.168.1.102 and repeat this same process.
In summary, the configuration file for api.example.com would look like this:
server {
    listen 80;
    server_name api.example.com;

    location / {
        proxy_pass http://192.168.1.102;
        proxy_set_header Host $host;
        proxy_set_header X-Real-IP $remote_addr;
        proxy_set_header X-Forwarded-For $proxy_add_x_forwarded_for;
        proxy_set_header X-Forwarded-Proto $scheme;
    }
}
Same as the previous one, but pointing to another domain and another backend server hehe.
3.0 Nginx Configuration (Backend Server)
The configuration process on backend servers is similar to the Raspberry Pi, but with some differences. Here, Nginx won’t act as a reverse proxy, but will serve content directly, or if you want to make a reverse proxy to some internal service, like a Docker, a Node.js application, etc. you can also do it. First we’ll show a basic configuration, serving static files.
3.1 Create .conf file on backend servers
On each backend server, create a configuration file for Nginx. For example, on server 1 (/etc/nginx/sites-available/example.com.conf):
sudo nano /etc/nginx/sites-available/example.com.confThen, paste the following code:
server {
    listen 80;
    server_name example.com;

    location / {
        root /var/www/example.com;
        index index.html;
    }
}
The fun thing here is that you don’t need to worry so much about HTTPS, details and all that, that’s done on the Raspberry Pi, since it’s the one that receives external requests. Here we only worry about serving the content.
3.2 Create symbolic link on backend servers
The same previous process of creating a symbolic link in the sites-enabled directory:
sudo ln -s /etc/nginx/sites-available/example.com.conf /etc/nginx/sites-enabled/Then, verify the configuration:
sudo nginx -tAnd restart Nginx:
sudo systemctl restart nginxNow, if a person accesses http://example.com, Nginx on the Raspberry Pi will redirect the request to the backend server, which will serve content from /var/www/example.com.
Amazing, right? Now you can repeat this process on the second backend server, changing the domain name and content path as needed.
3.3 Proxy Pass to an internal service
If instead of serving static files, you want Nginx on the backend server to act as a reverse proxy for an internal service (for example, a Node.js application running on port 3000), you can configure Nginx as follows:
server {
    listen 80;
    server_name api.example.com;
    location / {
        proxy_pass http://localhost:3000;
        proxy_set_header Host $host;
        proxy_set_header X-Real-IP $remote_addr;
        proxy_set_header X-Forwarded-For $proxy_add_x_forwarded_for;
        proxy_set_header X-Forwarded-Proto $scheme;
    }
}
These are the basic tags for Nginx to work correctly as a reverse proxy, ensuring HTTP headers are properly maintained. You can modify or add more configurations according to your application’s needs, if you want to choose another port, like 8080, 5000, 4321, whatever you need. The important thing is that the service is running and Nginx (Raspberry Pi) can communicate with it.
3.4 What happens if you proxy_pass to a service that’s not running?
If you perform the above process, like doing a proxy_pass to localhost:3000, but this service is not running, Nginx will return a 502 Bad Gateway error, indicating it couldn’t connect to the backend service. Make sure the service is active and listening on the correct port to avoid this error.

How horrible, right? you can even take advantage of this, create a maintenance view, or something like that, but well, someday I’ll write a post about error handling in Nginx.
4.0 Enable HTTPS with Certbot (optional)
If you want to enable HTTPS in your Nginx configuration, you can use Certbot to obtain free SSL certificates from Let’s Encrypt. Here I’ll explain how to do it.
We’ll do this only on the Raspberry Pi, since it’s the one that receives external requests. For backend services, it’s not necessary, unless you want to do it for some specific reason.
4.1 Obtain SSL certificates
To obtain an SSL certificate for your domain, run the following command on the Raspberry Pi:
sudo certbot certonly --nginx -d example.com -d api.example.comusing the specific nginx options so Certbot uses Nginx, since it can work with Apache and other web servers. The -d parameter is used to specify the domains you want to generate certificates for. You can add as many domains as you need by repeating the -d parameter. The certonly parameter indicates that you only want to obtain the certificate without automatically modifying the Nginx configuration. If you don’t specify certonly, Certbot will try to modify the Nginx configuration to enable HTTPS automatically, if you’re a ‘purist’ you might prefer to do it manually, as in this example.
4.2 Certificate location
The certificates generated by Certbot are stored in the /etc/letsencrypt/live/your_domain/ directory. Here you’ll find the following files:
/etc/letsencrypt/live/example.com/
├── cert.pem         # Public certificate
├── chain.pem        # Certificate chain
├── fullchain.pem    # Complete certificate (certificate + chain)
└── privkey.pem      # Private key
For Nginx configuration, you’ll generally use fullchain.pem and privkey.pem.
4.3 Configure Nginx to use HTTPS
After obtaining the certificates, you must configure Nginx to use HTTPS. Open your site’s configuration file on the Raspberry Pi:
sudo nano /etc/nginx/sites-available/example.com.confYou can modify our previous configuration to look like this:
server {
    listen 80;
    server_name example.com;
    return 301 https://$host$request_uri; # With this fragment the system will redirect HTTP to HTTPS automatically. Cool trick right?
}

server {
    listen 443 ssl;
    server_name example.com;

    ssl_certificate /etc/letsencrypt/live/example.com/fullchain.pem;
    ssl_certificate_key /etc/letsencrypt/live/example.com/privkey.pem;
    include /etc/letsencrypt/options-ssl-nginx.conf;

    location / {
        root /var/www/example.com;
        index index.html;
    }
}
Repeat this process for each domain or subdomain you want to configure, making sure to change the certificate paths as needed.
For the subdomain api.example.com, the configuration would be similar:
server {
    listen 80;
    server_name api.example.com;
    return 301 https://$host$request_uri; # Redirect HTTP to HTTPS
}

server {
    listen 443 ssl;
    server_name api.example.com;

    ssl_certificate /etc/letsencrypt/live/api.example.com/fullchain.pem;
    ssl_certificate_key /etc/letsencrypt/live/api.example.com/privkey.pem;
    include /etc/letsencrypt/options-ssl-nginx.conf;

    location / {
        proxy_pass http://localhost:3000;
        proxy_set_header Host $host;
        proxy_set_header X-Real-IP $remote_addr;
        proxy_set_header X-Forwarded-For $proxy_add_x_forwarded_for;
        proxy_set_header X-Forwarded-Proto $scheme;
    }
}
The important things to have SSL are:
-Have the certificate files in the correct path
-Have the listen 443 ssl; block
-Have the ssl_certificate and ssl_certificate_key directives pointing to the correct files
-(Optional) Redirect HTTP to HTTPS to improve security and avoid problems with your end users
4.4 Verify configuration and restart Nginx
After modifying the configuration, verify everything is correct:
sudo nginx -tIf the test is successful, restart Nginx to apply the changes:
sudo systemctl restart nginxNow simply if you visit https://example.com or https://api.example.com, you should see the green padlock in the address bar, indicating the connection is secure.
Congratulations, you have successfully configured a reverse proxy with Nginx on a Raspberry Pi, redirecting requests to multiple backend servers and enabling HTTPS for a secure connection. This configuration is ideal for managing multiple web services on a local network, providing an additional layer of security and flexibility.
Remember you can always modify and adapt this configuration according to the specific needs of your network and services. Good luck with your network architecture!
Conclusion
In this tutorial, we’ve covered the necessary steps to implement a reverse proxy with Nginx on a Raspberry Pi, including HTTPS configuration with Let’s Encrypt. This is a powerful and flexible solution for managing multiple web services securely. With this configuration, you can direct traffic efficiently and securely, improving user experience and your network’s security. You can also scale it according to what you need, adding more backend servers or adjusting configurations according to your specific needs. Remember to always keep the Raspberry Pi and Nginx running for the reverse proxy to work correctly, otherwise, the web pages won’t load.
Until next time!