How to link your domain to a DNS server - Blog AstronautMarkus
"Learn how to link your domain to a DNS server in a few simple steps. You will learn everything from what a domain is to how to use it so everyone can access your website."
Published: October 2, 2025
Modified: October 2, 2025
Link Your Domain to a DNS Server: A Numbered Guide
Greetings, network travelers! Since I’ve been working in systems and network administration, many colleagues have asked me concepts like: how do I set up my website on my server? or how do I make my domain point to my server? or what is a domain and what is it for? So in this article, I’m going to explain step by step how to do this and also explain some basic DNS and domain concepts.
What is a domain?
An internet domain is a name used to identify a website on the internet, that is, the address that people type in their browser to access a website. For example, astronautmarkus.dev, my personal domain.
Why use a domain?
Using a domain has several advantages, especially making life easier for users by facilitating remembering a name or web address, instead of having to remember a numerical IP address, susceptible to changes, since if the server changes IP, the domain can continue pointing to the new server without users having to do anything.
In addition to domains, which are easy to remember, there are also subdomains, which are an extension of the main domain and are used to organize and categorize website content. For example, blog.astronautmarkus.dev is a subdomain of astronautmarkus.dev.
Why use a subdomain?
There are many reasons to use subdomains, mainly to organize website content. For example, if you have a company website, you can use subdomains to separate the online store content from the blog or technical support, for example:
store.example.comfor the online store.blog.example.comfor the blog.support.example.comfor technical support.
In our case, we use the subdomain blog.astronautmarkus.dev for the blog, and www.astronautmarkus.dev for the main page. What a trick, right?
You can even use subdomains for different services, like mail.example.com for email or sftp.example.com for SFTP access, or website decorators, like the famous www, although it’s currently no longer necessary, but if you want to use it, you can do so without problems.
What is a DNS server?
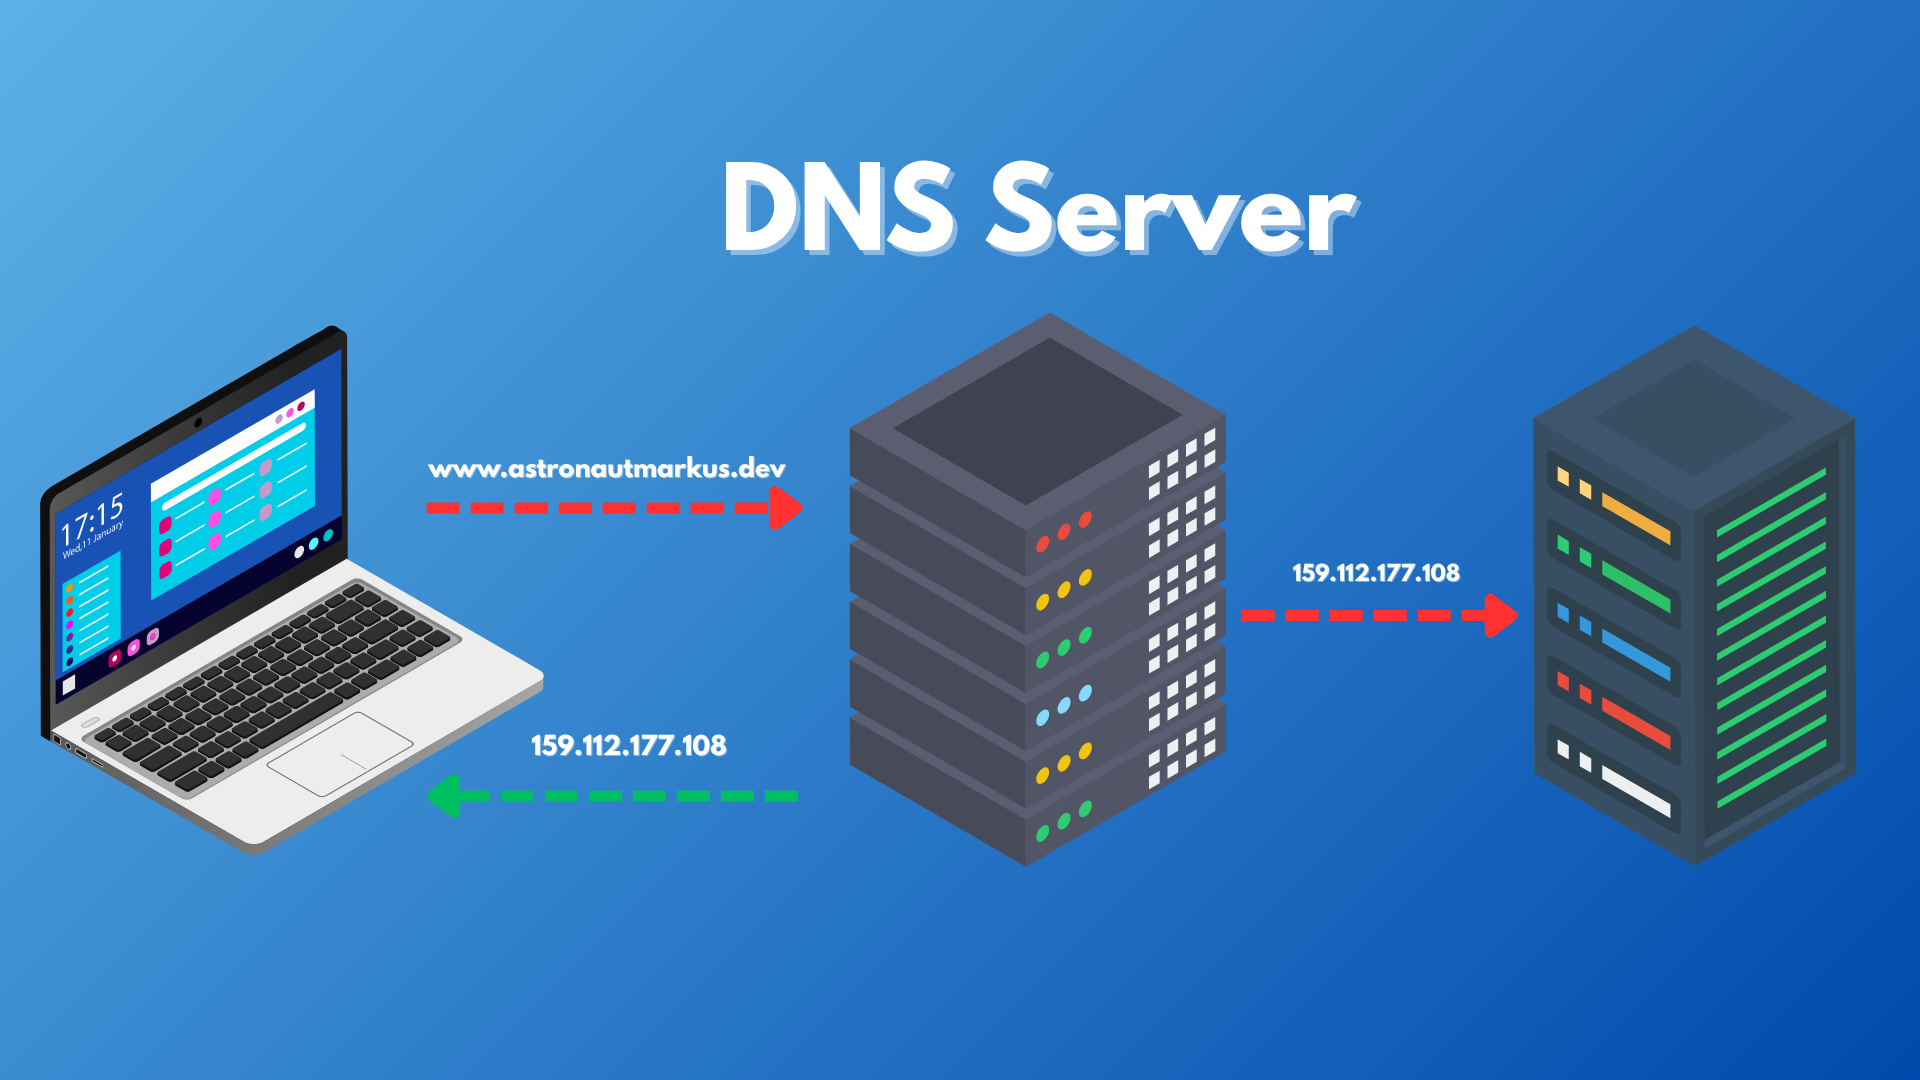
A DNS (Domain Name System) server is a system that translates domain names into IP addresses, which are used by devices to communicate over the internet. When a user types a domain name in their browser, the DNS server is responsible for finding the corresponding IP address and redirecting the user to the correct webpage.
We must think of this process:
- The user types the domain in their browser, for example
www.example.com. - The browser needs the real IP address of the server to connect, but doesn’t know it.
- The request reaches the DNS server (resolver) configured on the device (usually your internet provider’s or a public one like Google or Cloudflare), something like
1.1.1.1or8.8.8.8. - First, the DNS checks its local cache: if it already has the IP saved, it returns it instantly.
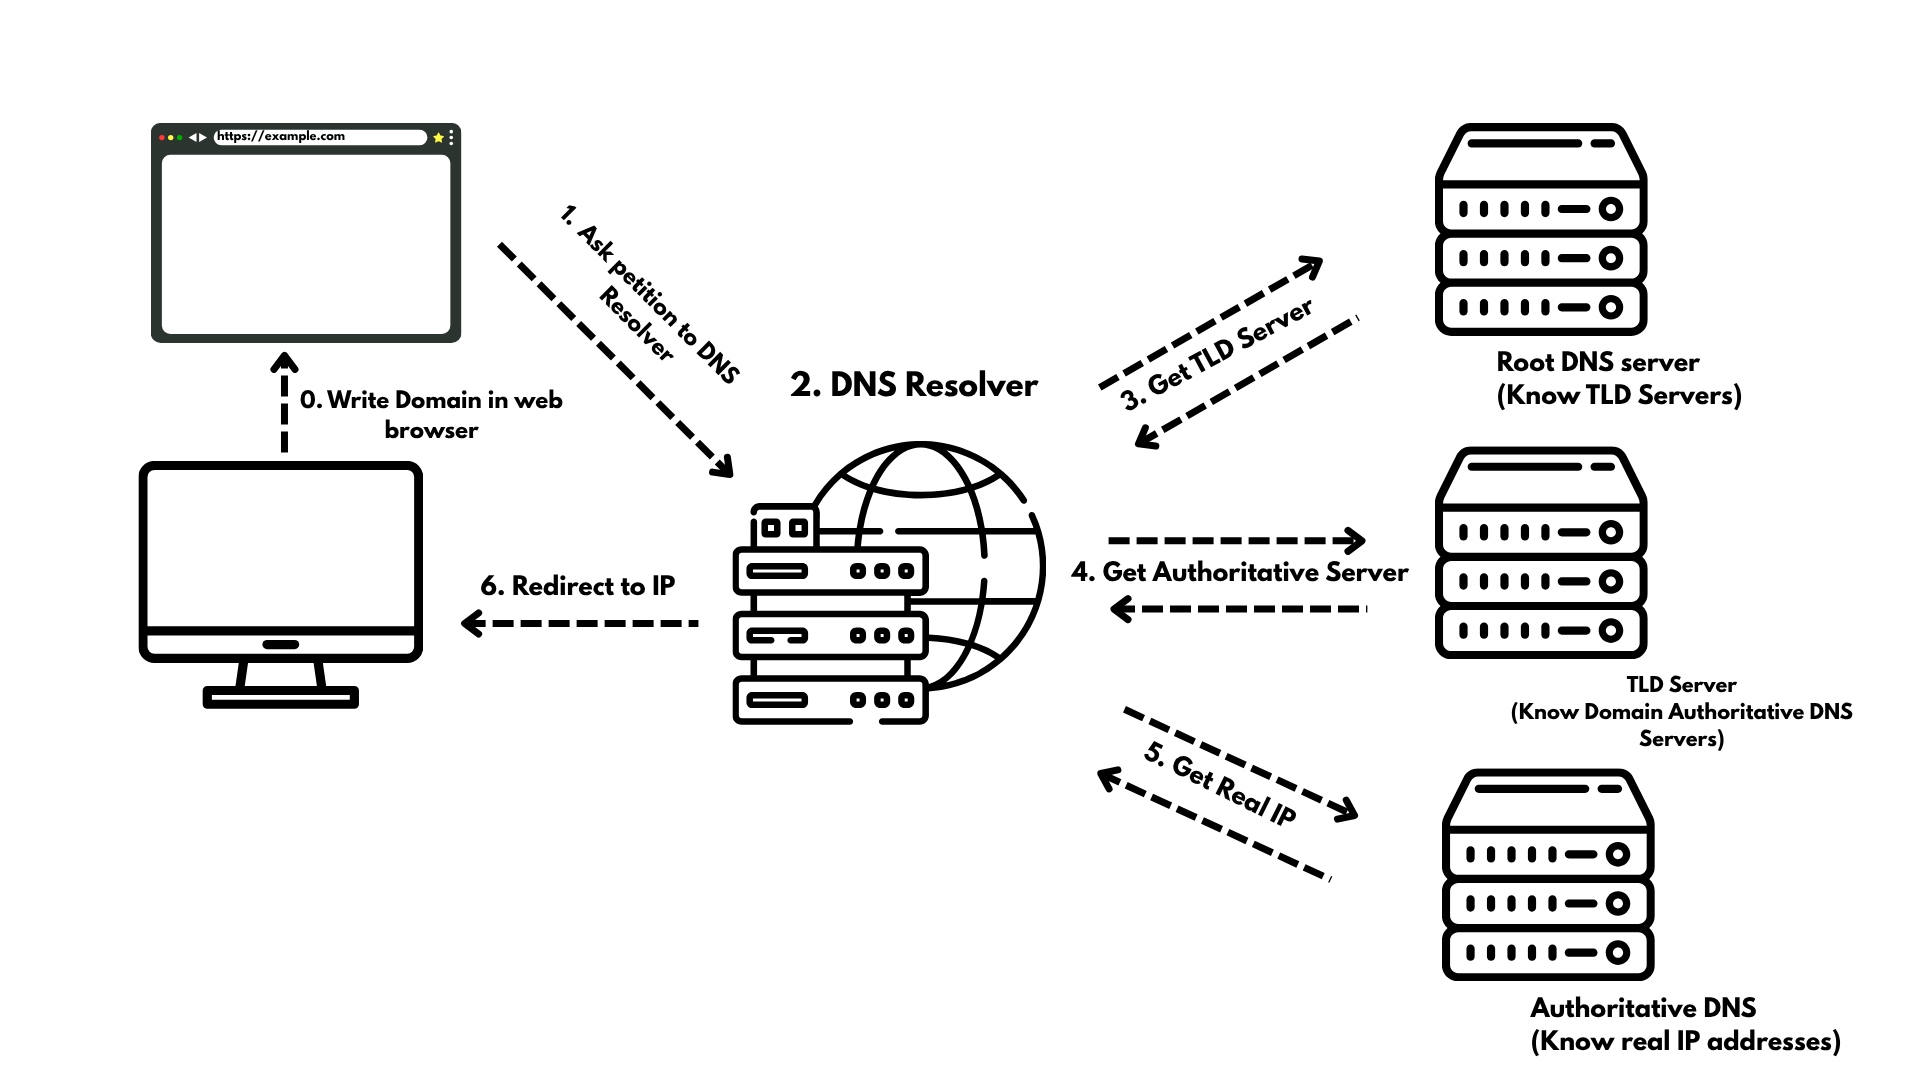
- If it doesn’t have it, the resolver starts a step-by-step search:
- It asks the root servers (Root DNS) → these indicate which servers manage the top-level domain (for example,
.com). - It asks the TLD servers of
.com→ these tell it which server is authoritative forexample.com. For examplens1.example-dns.com. - It asks the authoritative server of
example.com, which returns the real IP of the domain.
- It asks the root servers (Root DNS) → these indicate which servers manage the top-level domain (for example,
- With the obtained IP, the DNS resolver sends it back to the user’s browser.
- Finally, the browser uses that IP to connect to the web server and load the requested page.
Magical, right?
Extra fact: Thanks to DNS cache, most of these queries don’t happen every time; often your computer or the resolver itself already remembers the IP and returns it in milliseconds. It’s not magic, it’s computer science.
How to link your domain to a DNS server?
Before starting, I’ll explain how to acquire a domain. If you already have one, you can skip this step.
1.0 Acquire a domain
To acquire a domain, we must first choose a domain registrar, which is a company authorized to sell and manage internet domains. Some of the most popular registrars are:
- Namecheap
- GoDaddy
- Google Domains
- Hover
- NIC Chile (For
.cldomains, Chile my country)
and a long etcetera. The process is almost the same everywhere, you simply need to search for the domain you want, verify if it’s available, add it to the cart and follow the steps to buy it.
In today’s example, I won’t directly show the purchase process, I’ll use my current domain astronautmarkus.dev, which I bought on GoDaddy, anyway I’ll leave a couple of reference images.
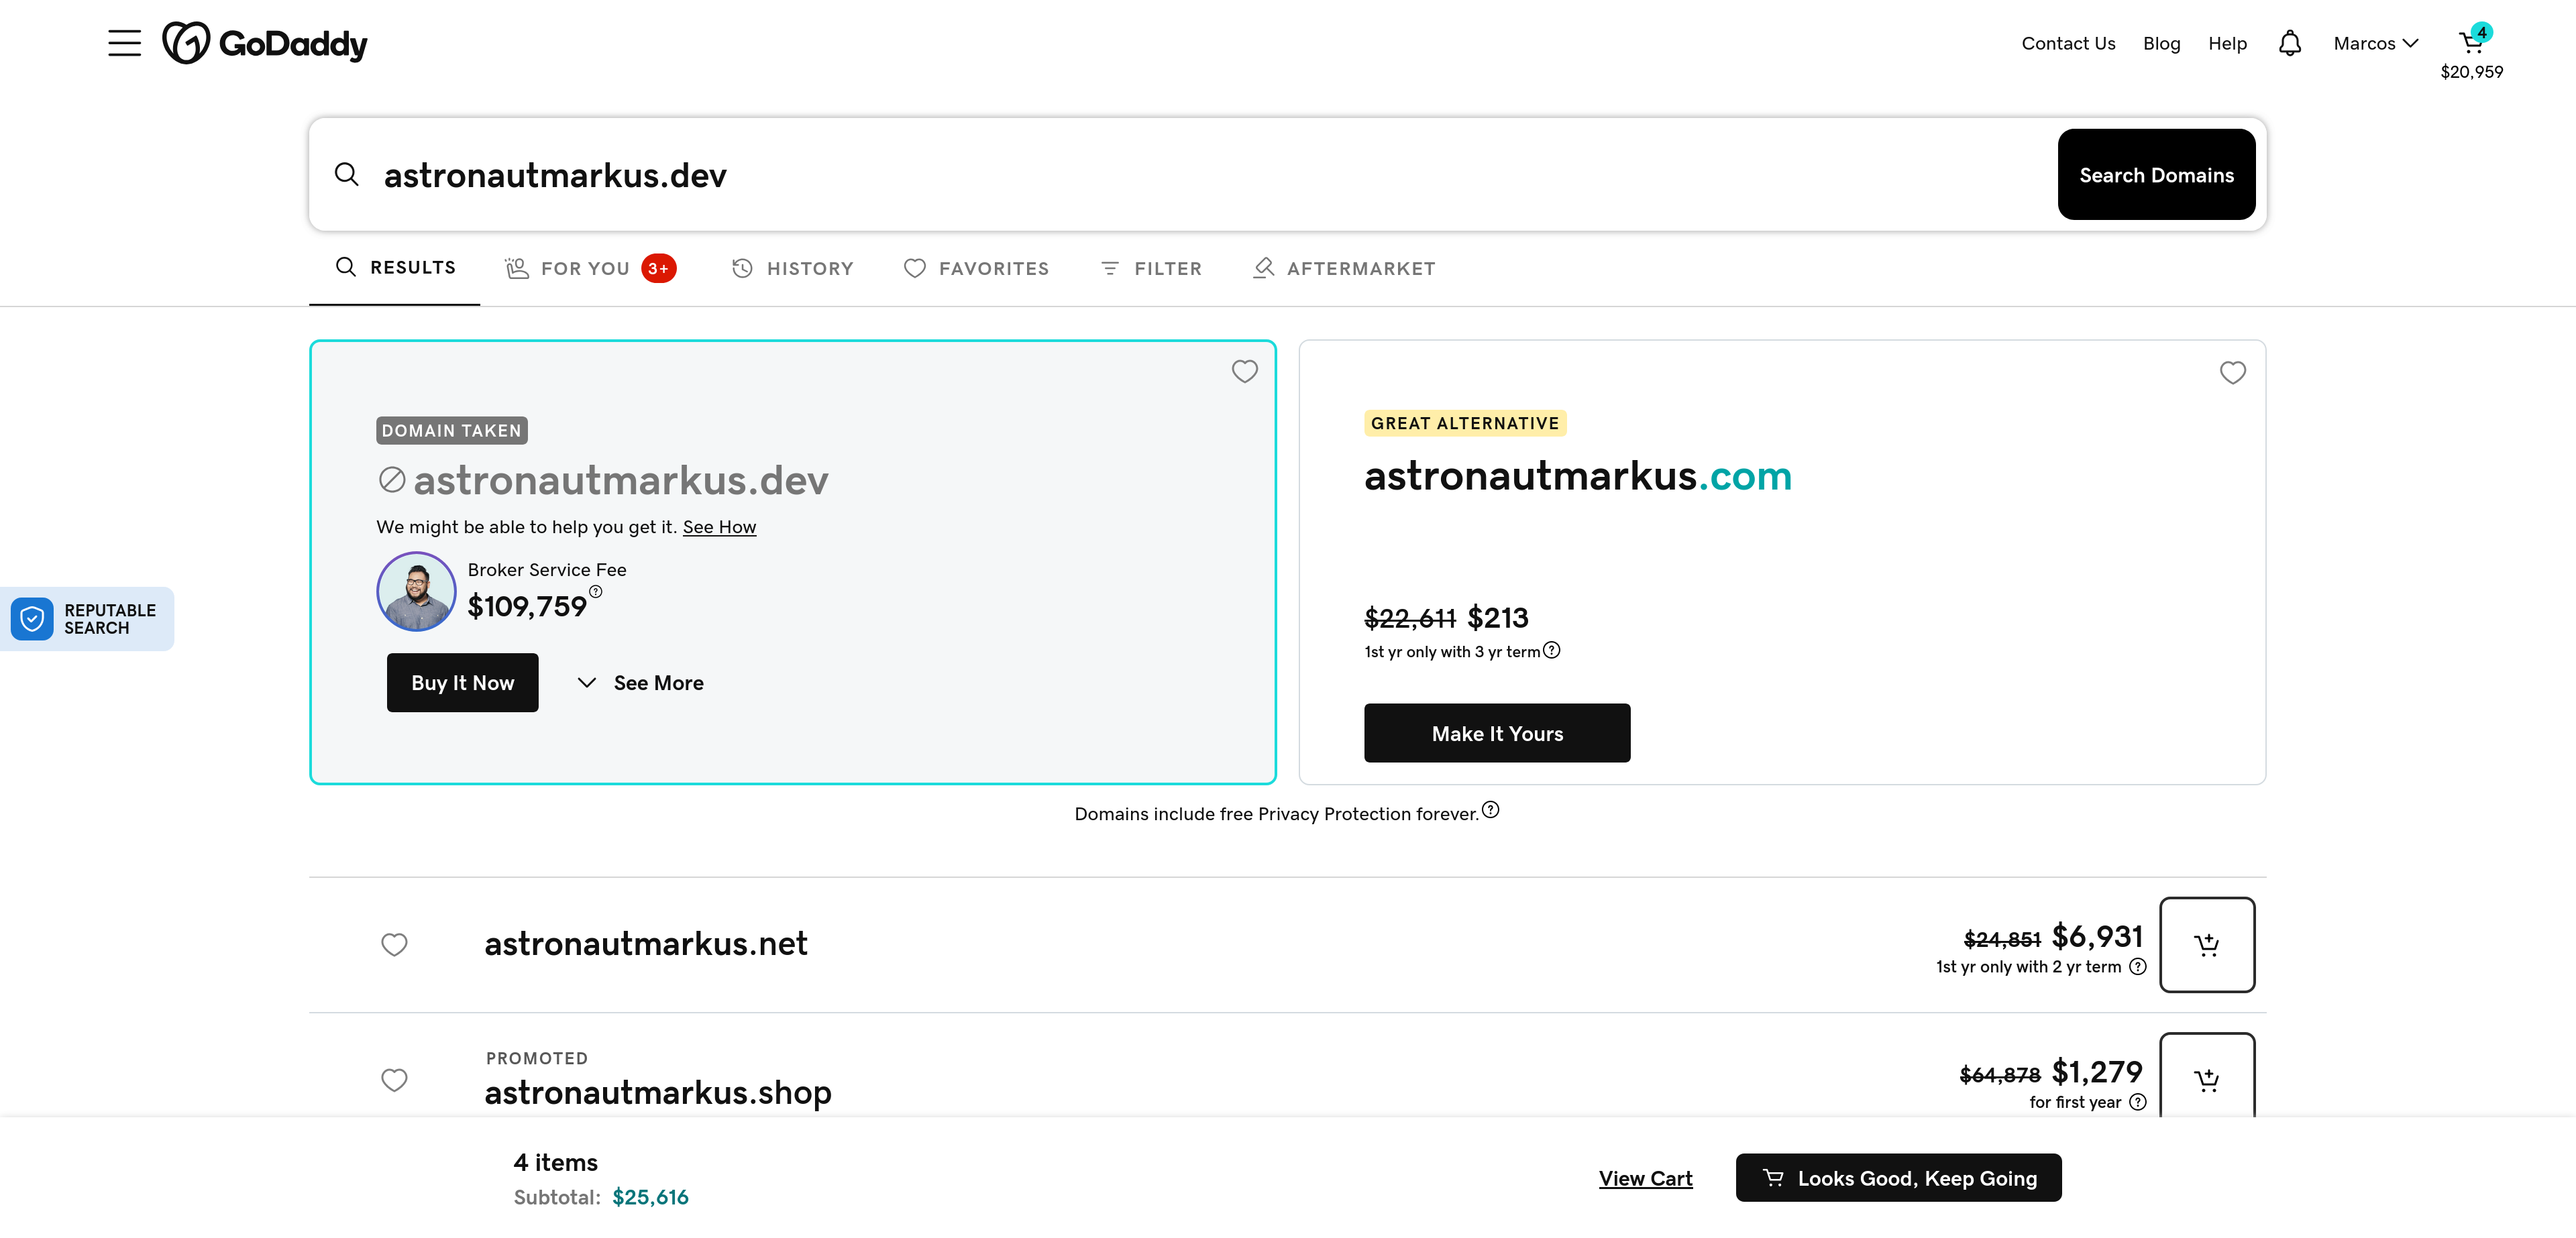
In this photo I show that I typed the domain I wanted to buy, if you notice it’s not available, because it’s my personal domain, haha, but if you search for one that’s available, you’ll be able to buy it without problems.
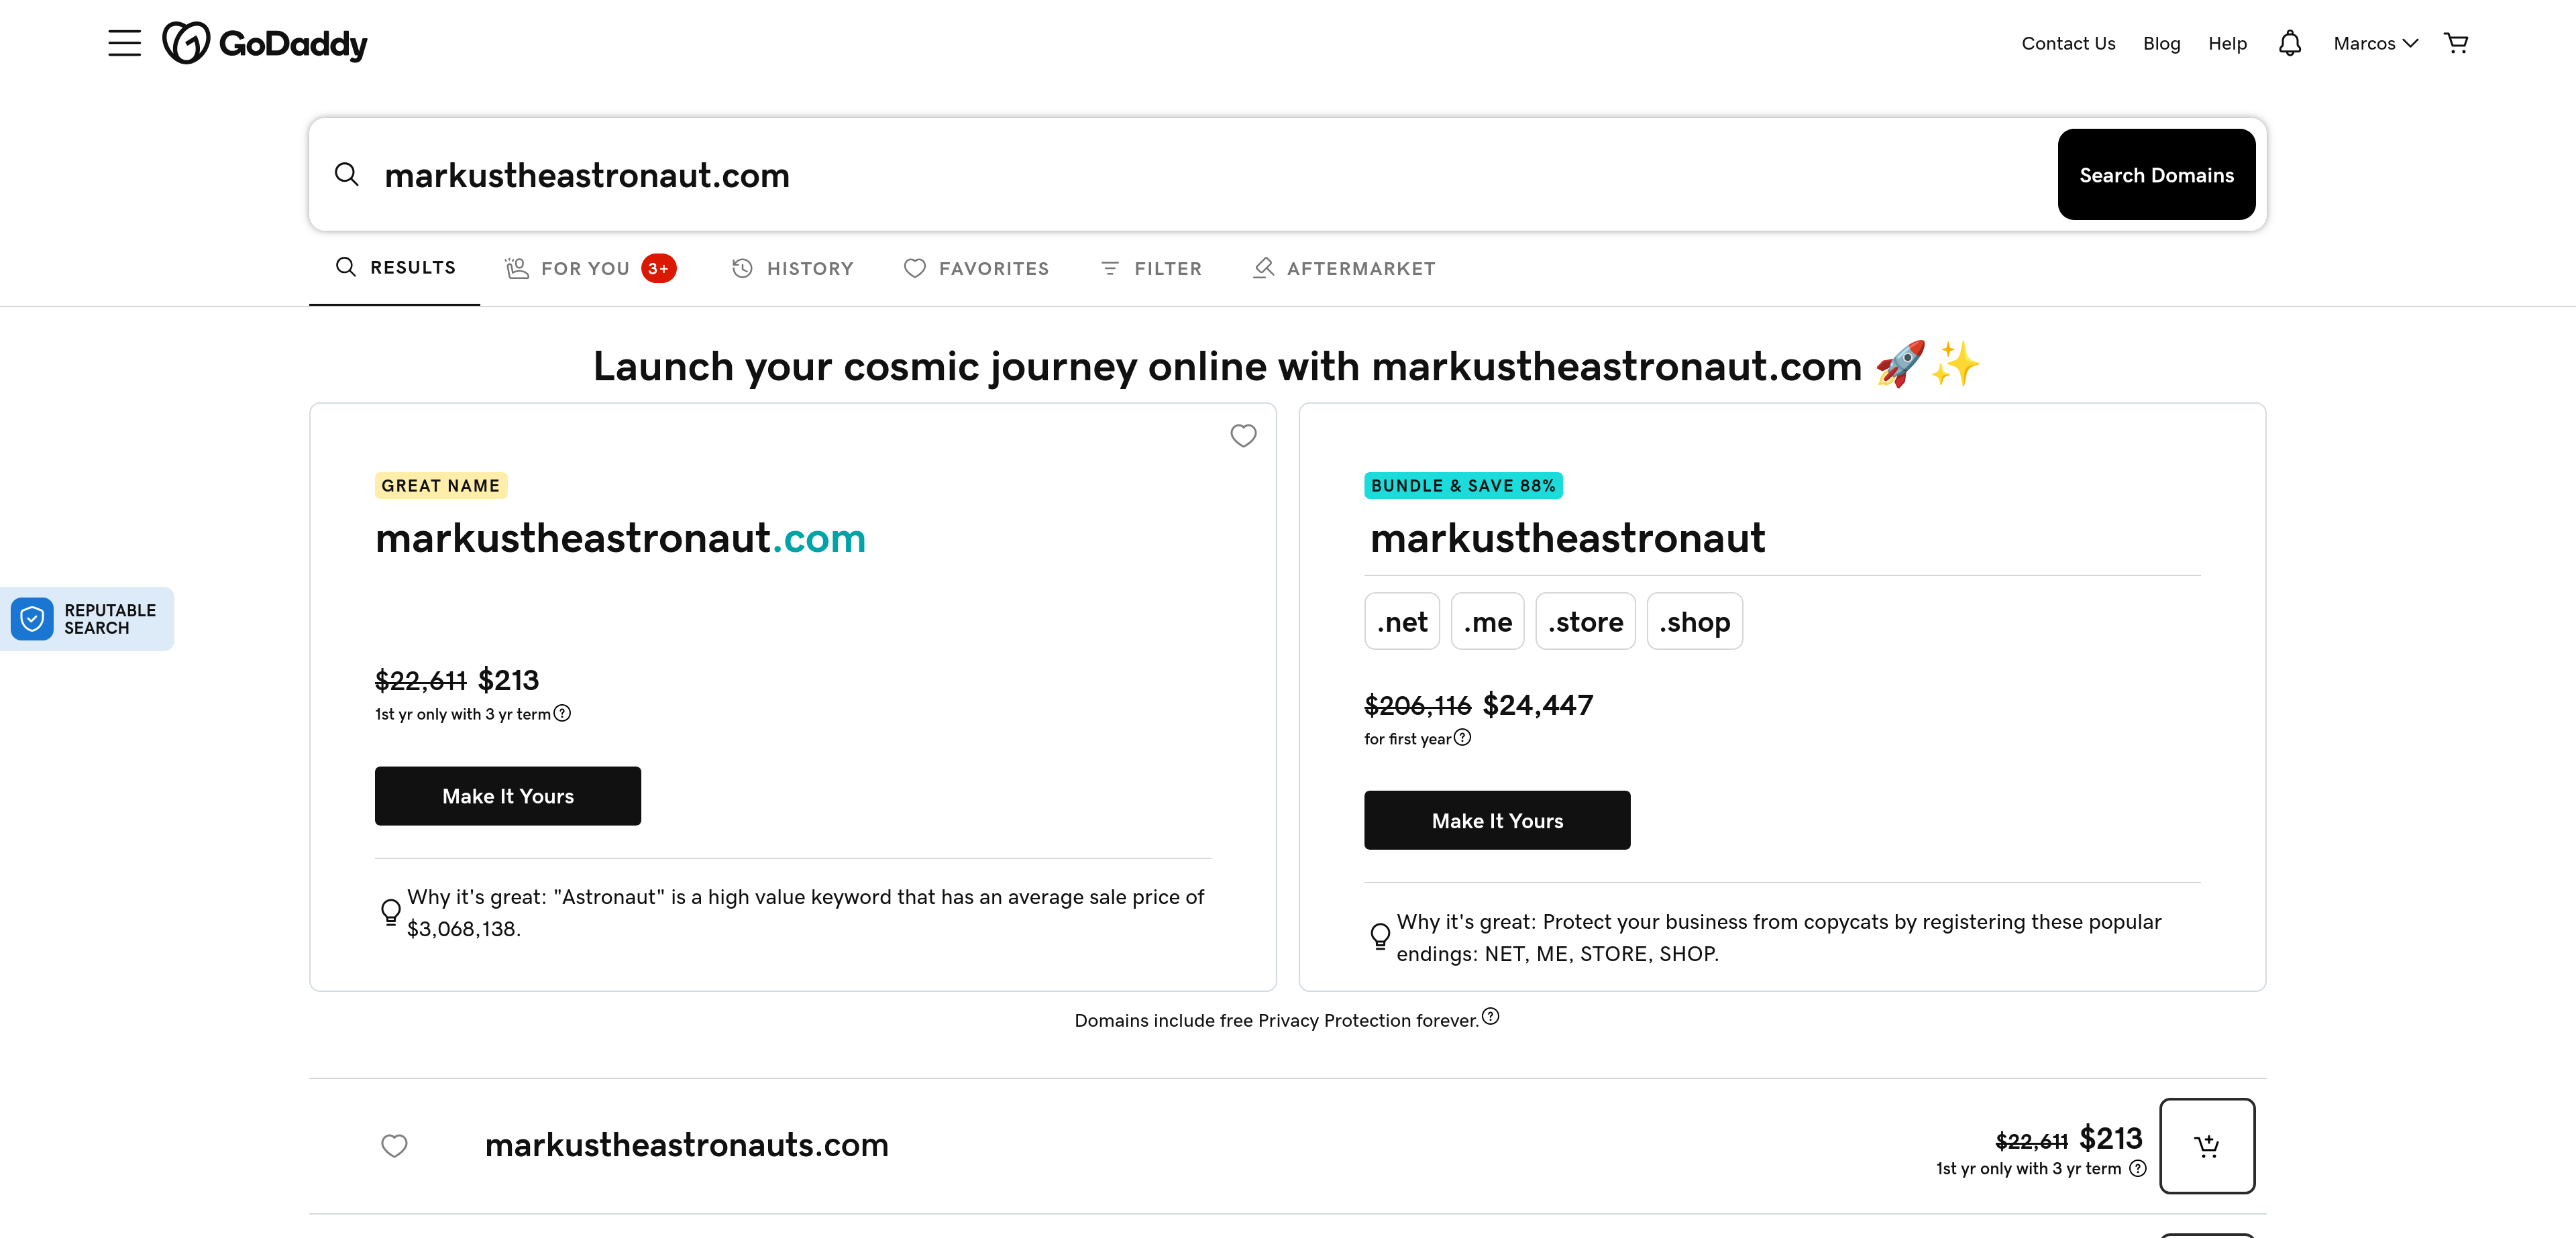
Here I used another domain, for example markustheastronaut.com, this one is available, so you can buy it without problems.
Note: There are many types of domains, the most common are
.com,.net,.org, but there are also country-specific domains, like.clfor Chile,.esfor Spain,.mxfor Mexico, etc. In addition to new and creative domains like.dev,.tech,.io, etc. Domain prices vary depending on the registrar and the type of domain you choose. Also remember that these domains are purchased for a limited time, commonly you buy it for a year, but you can buy it for longer if you want. Once you lose the domain, you have some time to recover it, but if you don’t, someone else can buy it. It’s like renting an apartment, if you don’t pay rent, they kick you out and someone else can rent it. Hehe.
After that, a confirmation email surely arrives, and that’s it, you now have your domain.
Now that we have the domain, let’s leave the registrar’s dashboard aside for a moment and move on to the next step to link our domain to a DNS server.
2.0 Choose a DNS provider
There are many DNS providers, some are free and others paid, some of the most popular are:
- Cloudflare (Free and paid)
- Google Domains (Paid)
- Amazon Route 53 (Paid)
- GoDaddy (Paid)
For this case, we’ll go with the safe choice of Cloudflare, it’s free, massive and has many additional functionalities, like DDoS protection, CDN, besides being very easy to use.
3.0 Create an account with the DNS provider
The first thing we must do is create an account with the DNS provider, in this case, Cloudflare. For this, we must go to Cloudflare’s page and click on “Sign Up” or “Create account”, then we must fill out the form with our data and follow the steps to create the account.
Once we have the account, we log into the platform.
4.0 Add the domain to the DNS provider
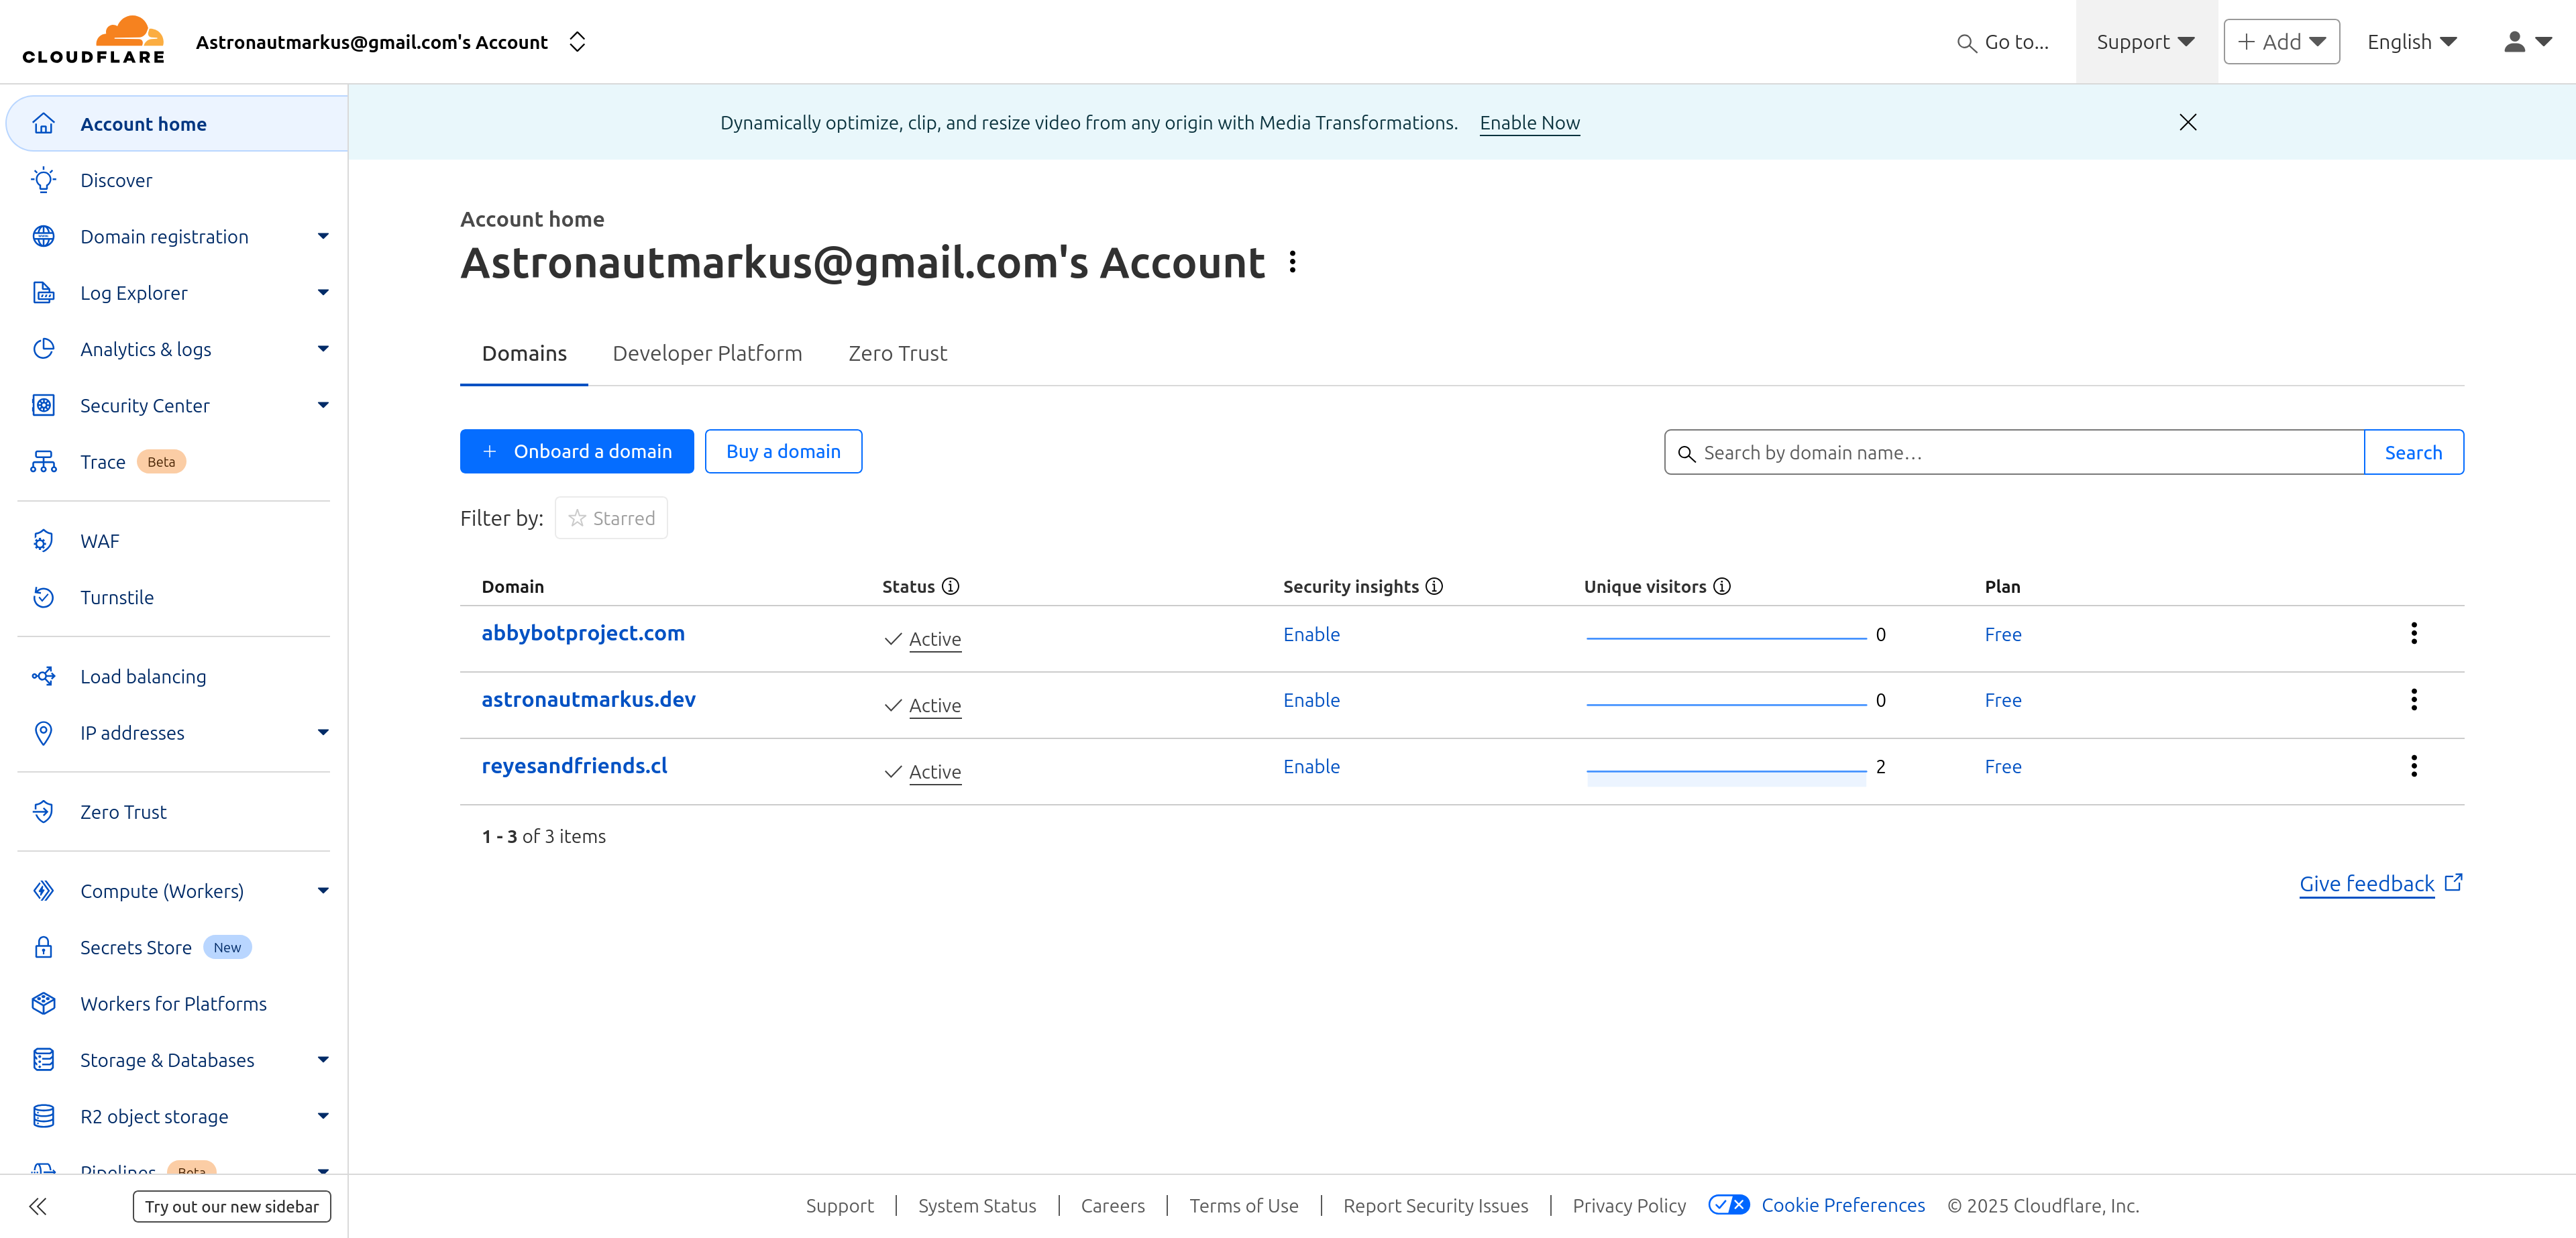
In this photo I already have a couple of personal domains in this account, you surely won’t have anything, so you must click on the “Onboard a domain” button, in other DNS it might say “Add Domain” or “Add domain”, but it’s almost the same.
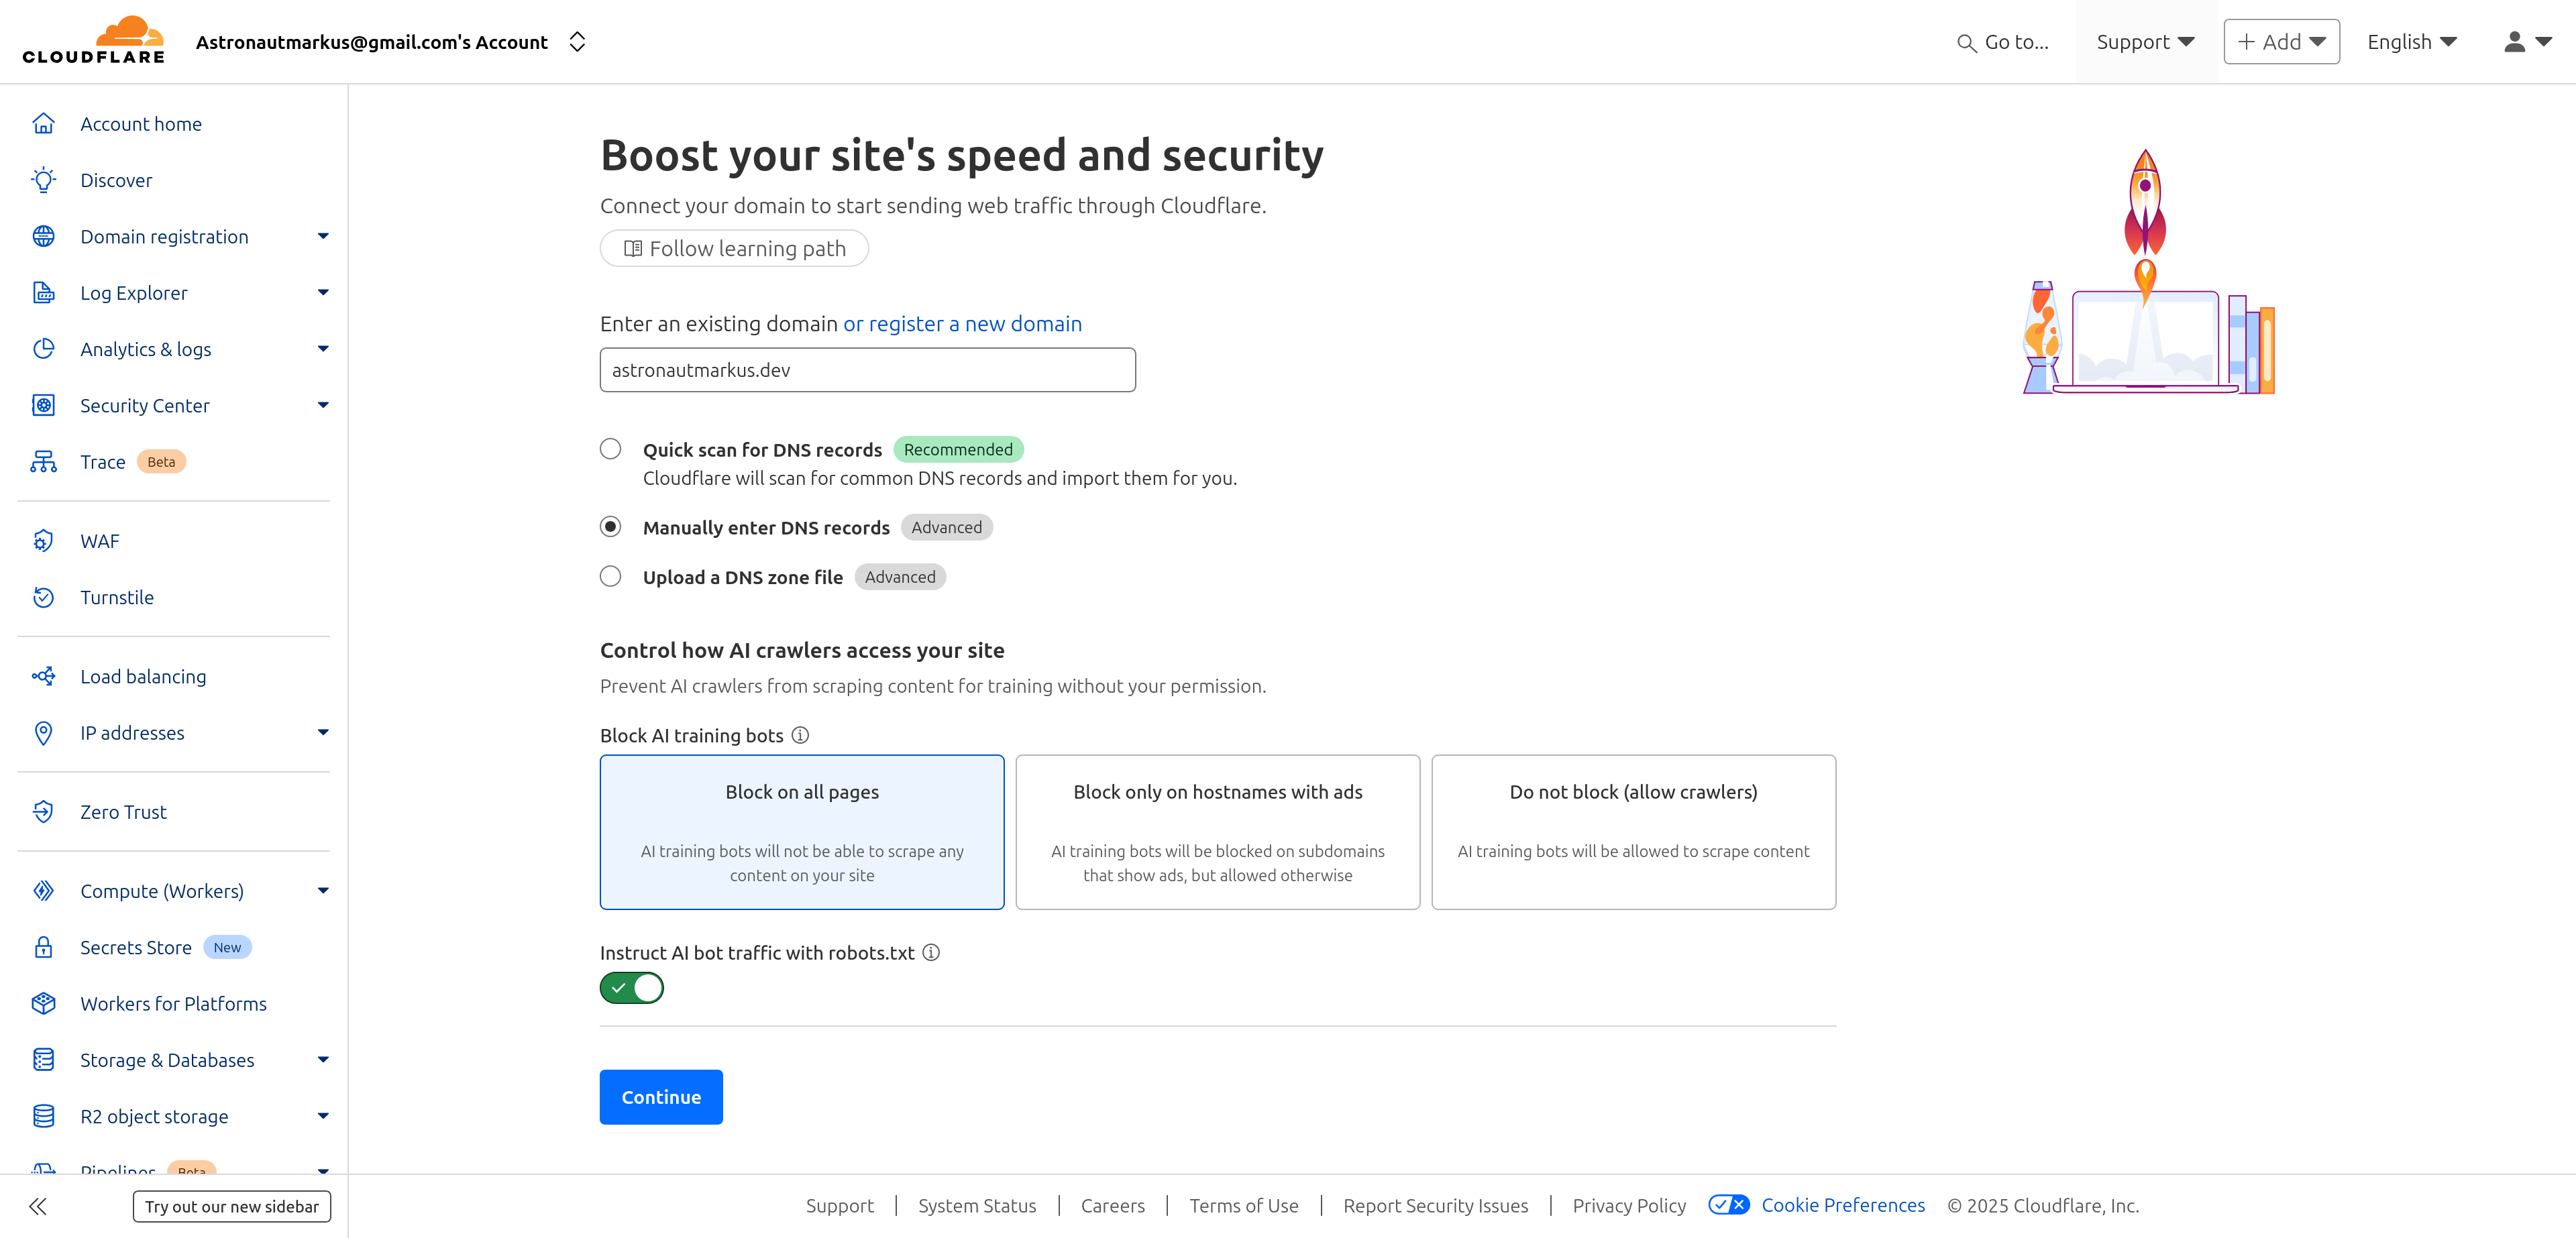
If Cloudflare asks you to choose a paid or free plan, choose the free one, don’t worry, it’s more than enough for most cases.
Once added, many things will appear, the important thing is to look for the following section:
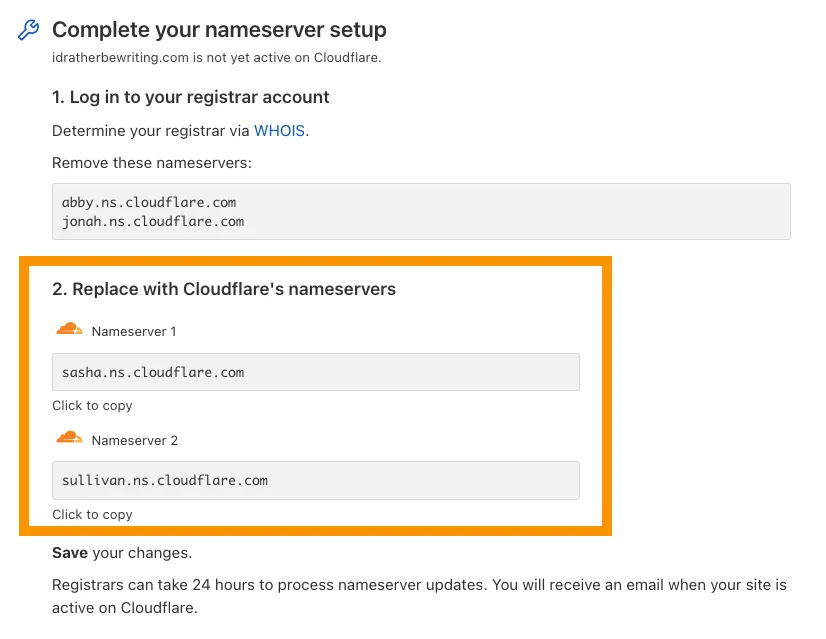
We must copy the nameservers that Cloudflare gives us, in this case they are:
sasha.ns.cloudflare.comsullivan.ns.cloudflare.com
It should be mentioned that these are different for each one, so Don’t use these, use the ones that your Cloudflare account gives you.
5.0 Change the nameservers in the domain registrar
Now we can return to the domain registrar’s dashboard, in this case, GoDaddy.
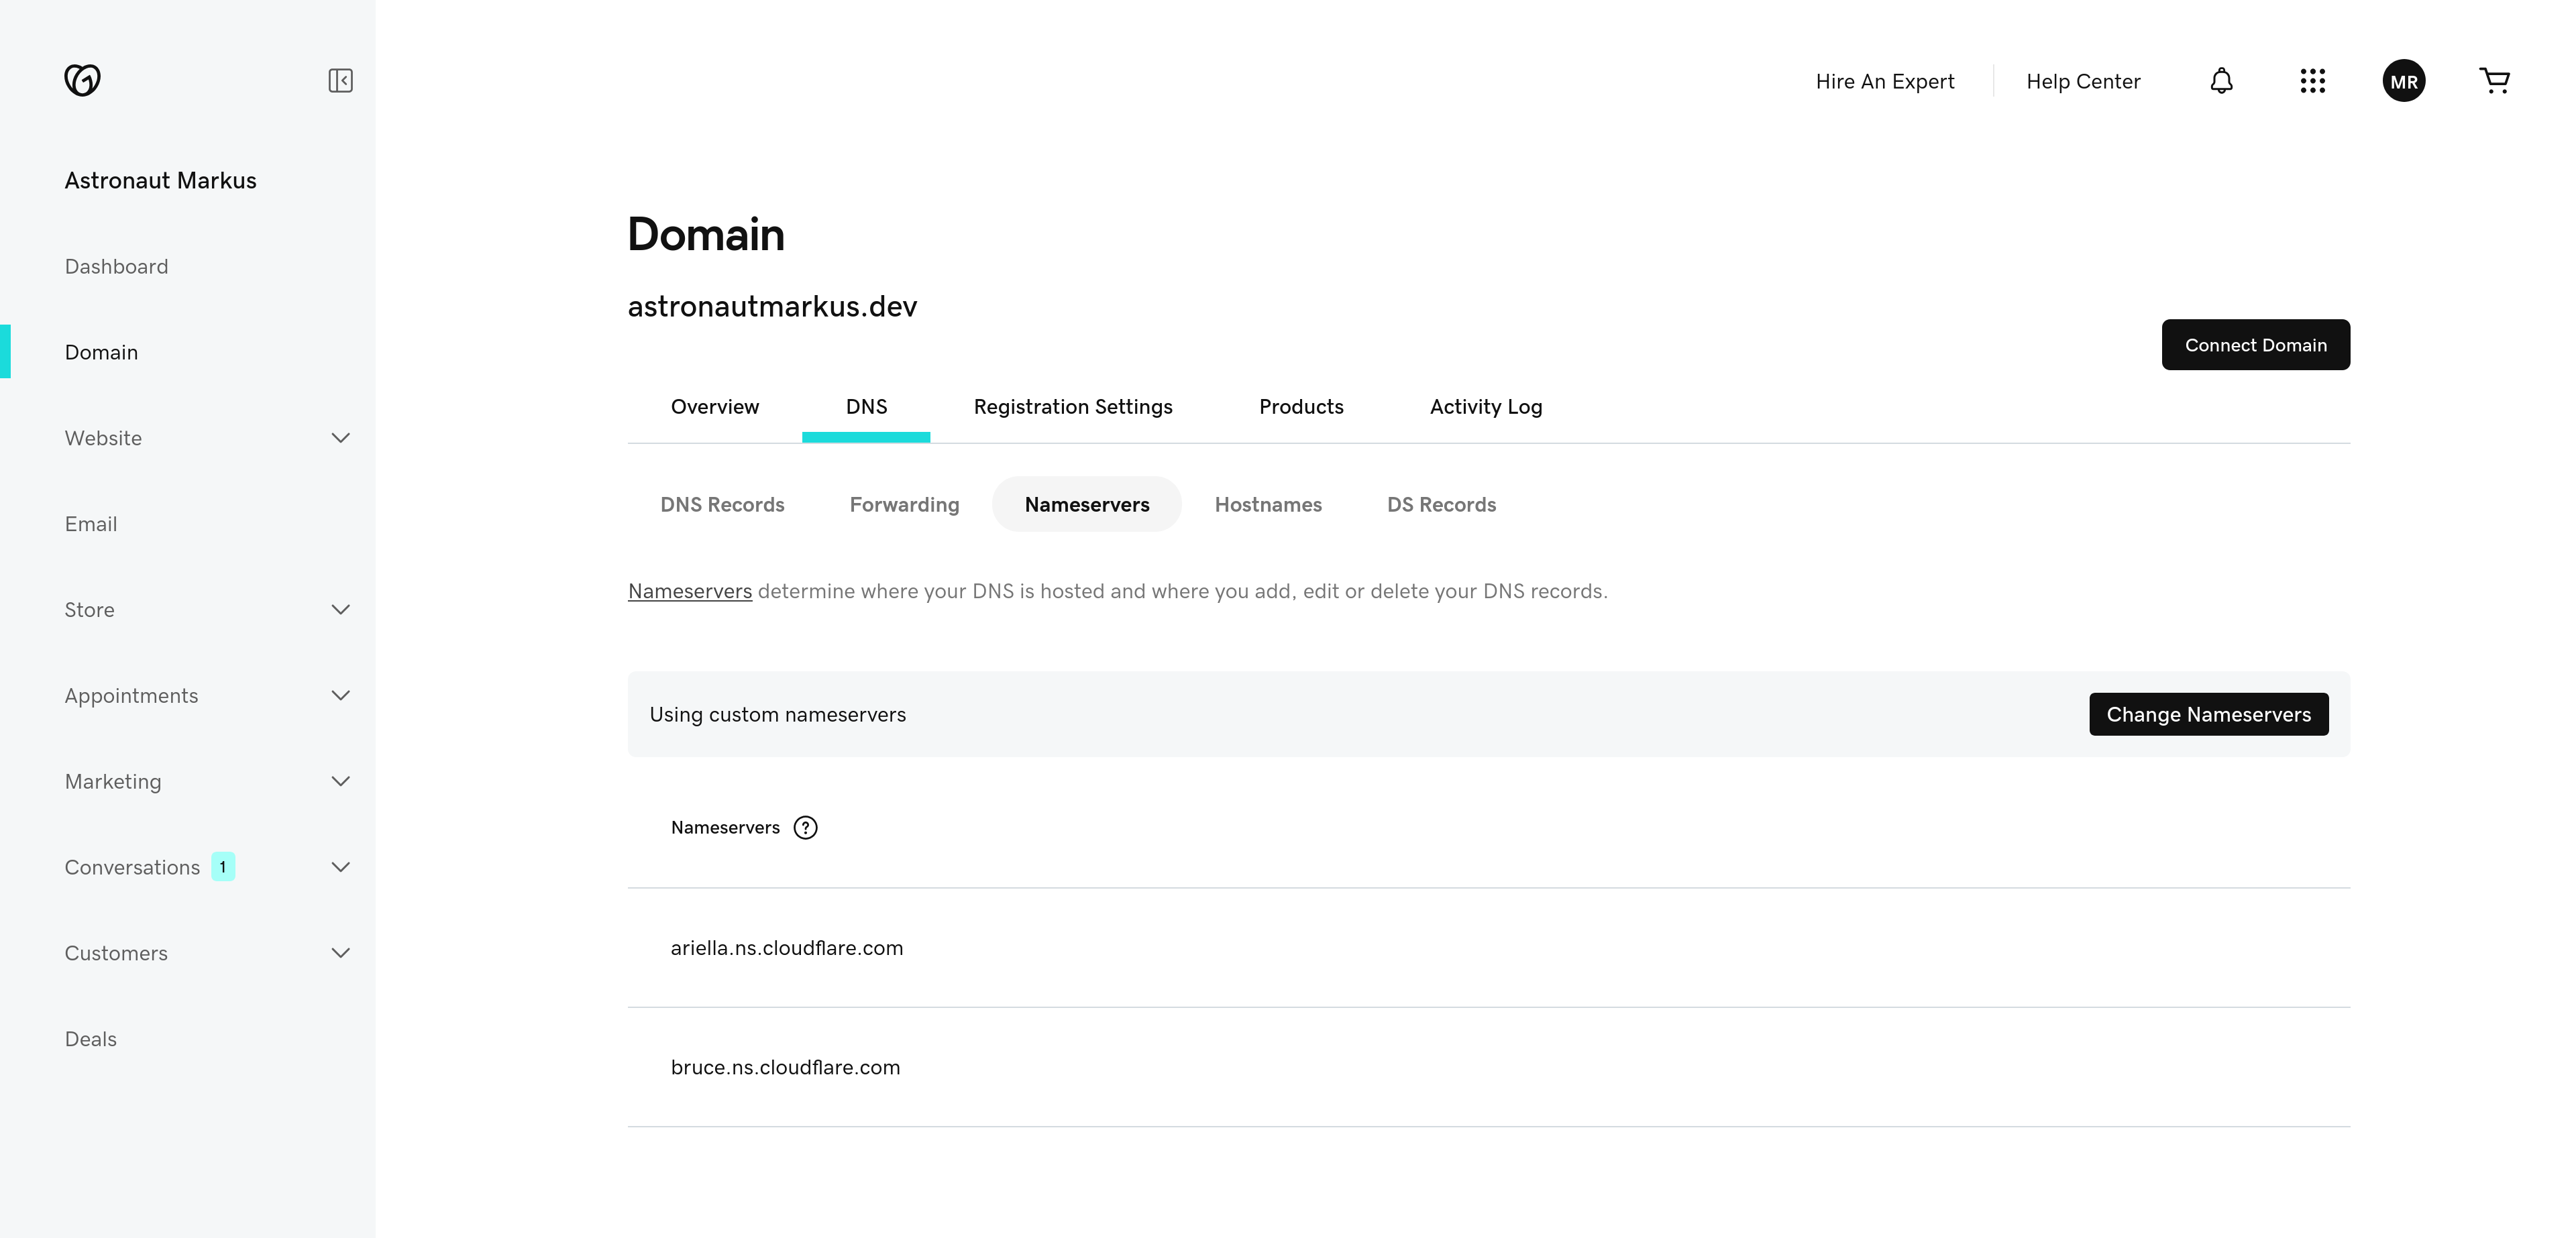
We must look for the “Manage DNS” or “Manage DNS” option, in the photo it’s “DNS”, in other registrars it might say “DNS Settings” or “DNS Configuration”, but it’s almost the same.
Then we must look for the “Nameservers” or “Nameservers” option, in the photo it’s “Nameservers”, in other registrars it might say “Change Nameservers” or “Change nameservers”, again, it’s almost the same everywhere.
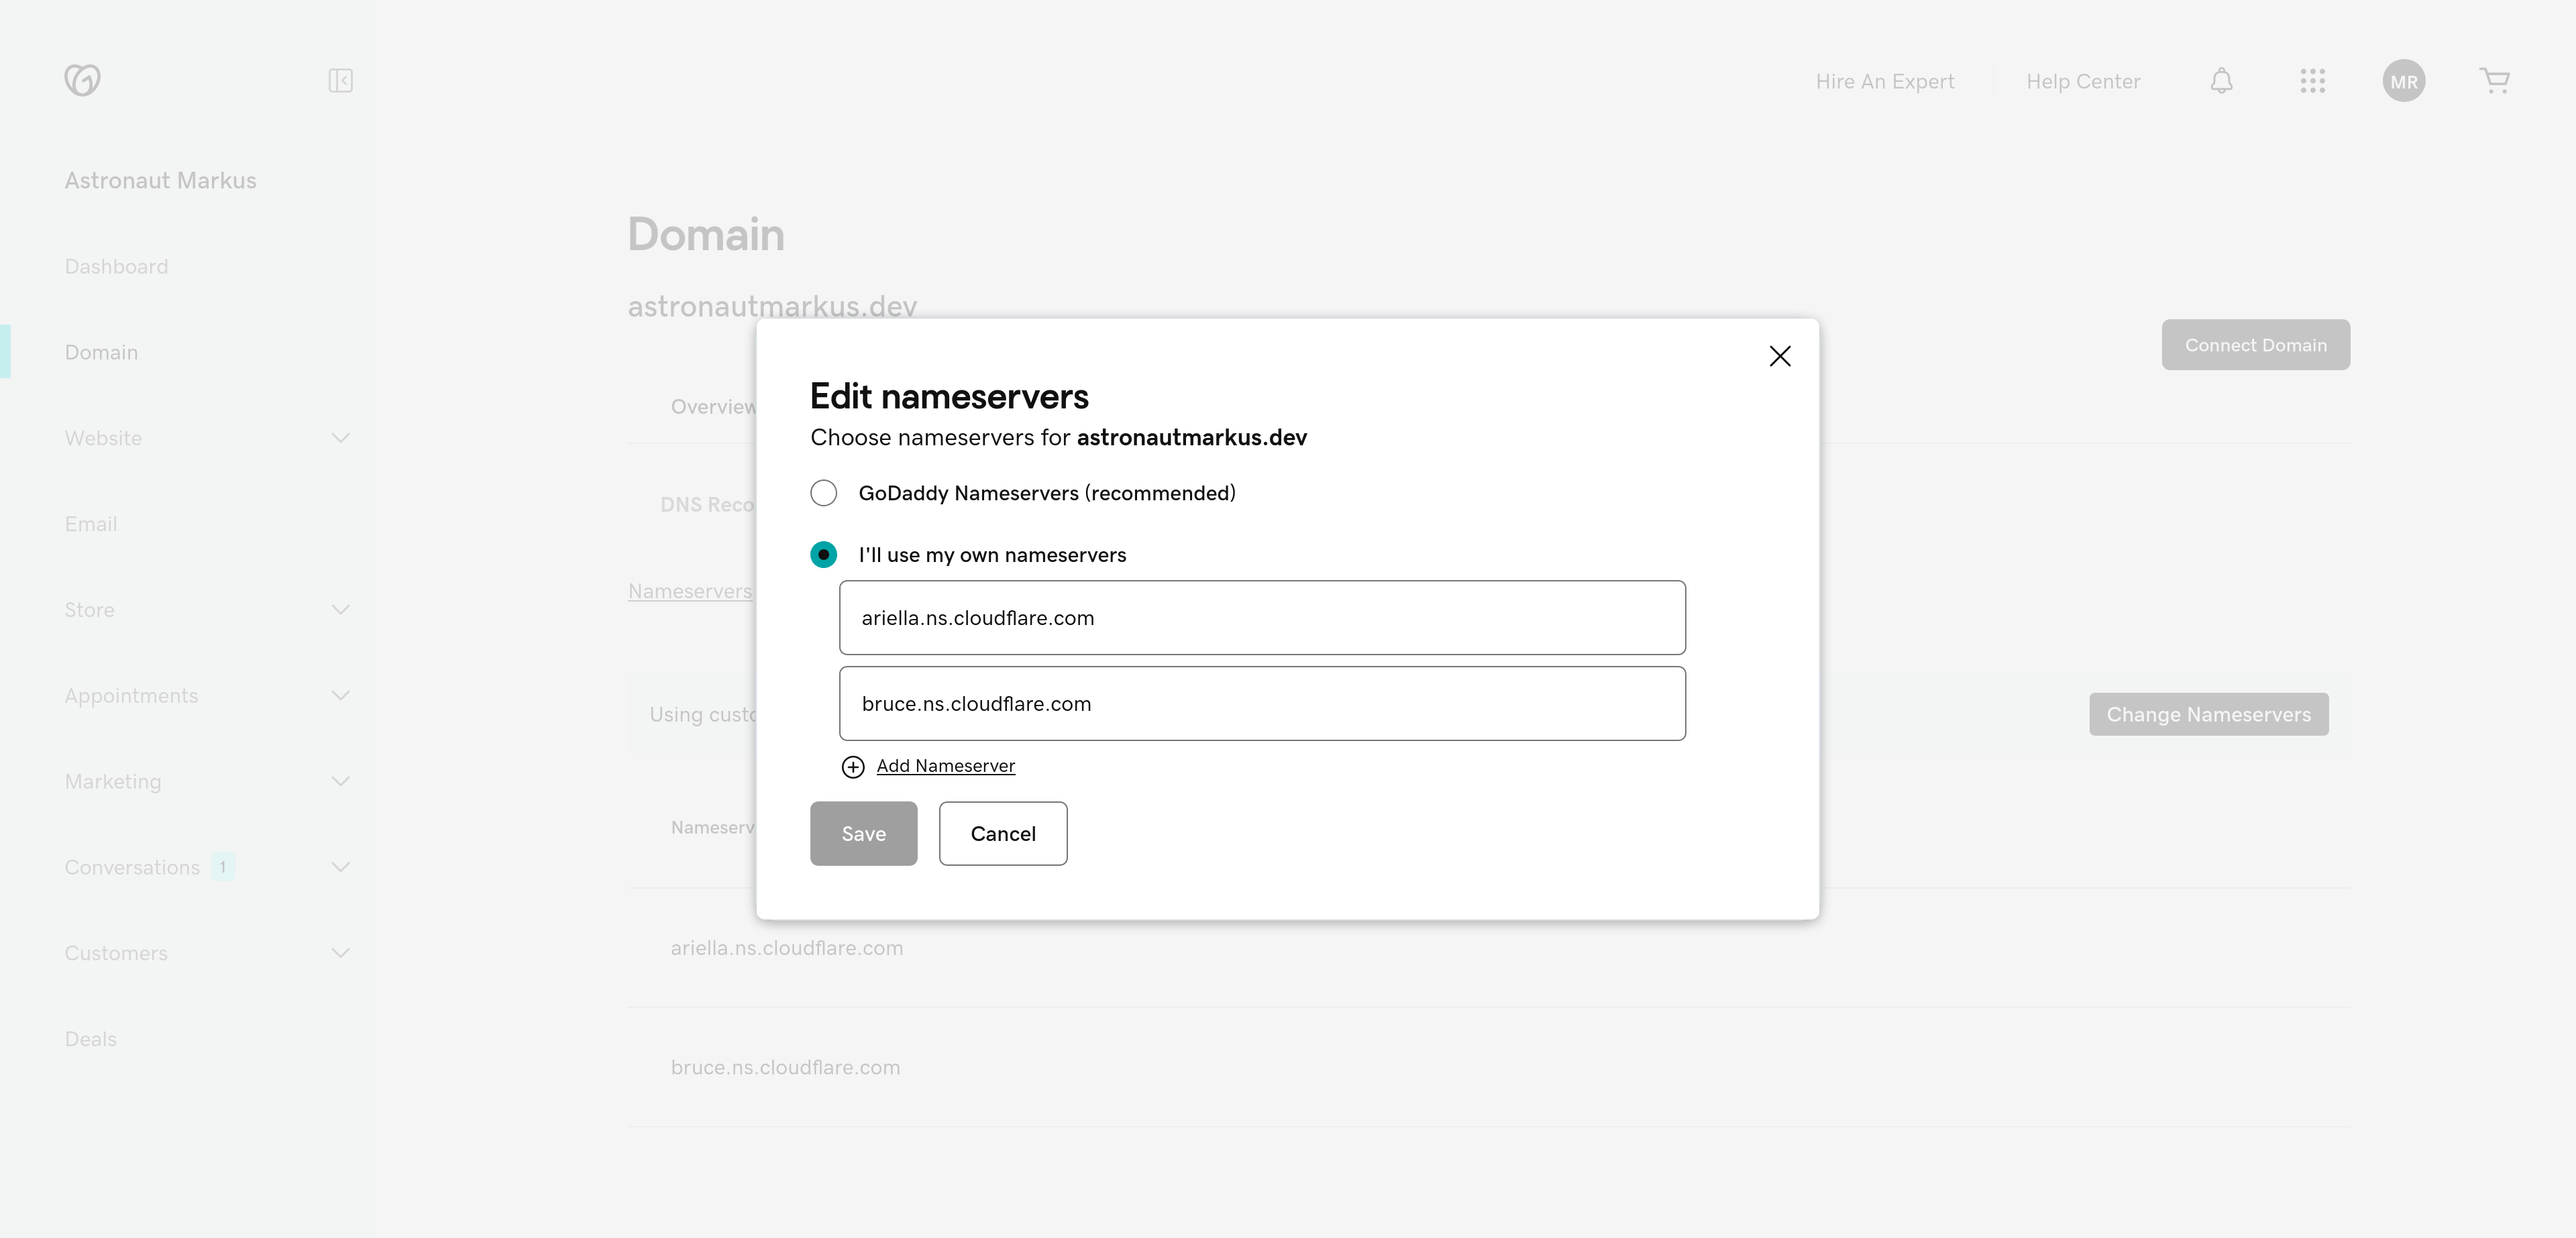
Here we must paste the nameservers that Cloudflare gave us in the previous step, in this case:
sasha.ns.cloudflare.comsullivan.ns.cloudflare.com
Remember, the ones Cloudflare gave you, not the ones in this example.
Finally we save the changes. Now our domain is linked to Cloudflare.
Note: This may take a while to propagate, it’s normally fast, but can take up to 48 hours in some cases.
6.0 Verify that the nameservers have been updated
After changing the nameservers, we must wait some time for the changes to propagate, this can take from a few minutes to 48 hours, although it’s normally much faster.
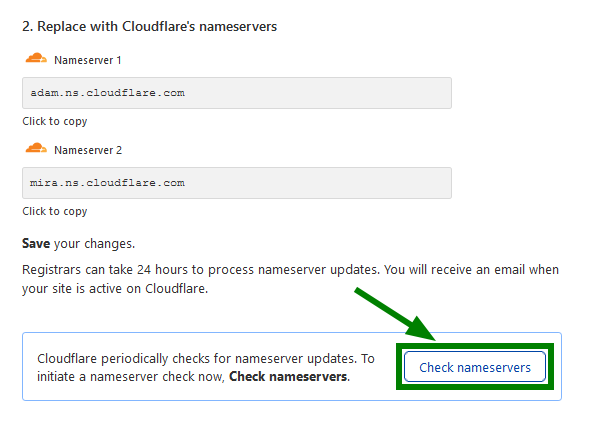
You can press the “Check Nameservers” button to verify if the changes have propagated correctly. I suggest waiting a couple of hours and then checking, in my case it took about 2 and a half hours for them to propagate everywhere. Cloudflare usually sends an email when the changes have propagated correctly, so relax and have some coffee.
7.0 Add DNS records
Now that our domain is linked to Cloudflare, we can add DNS records so that our domain points to our web server.
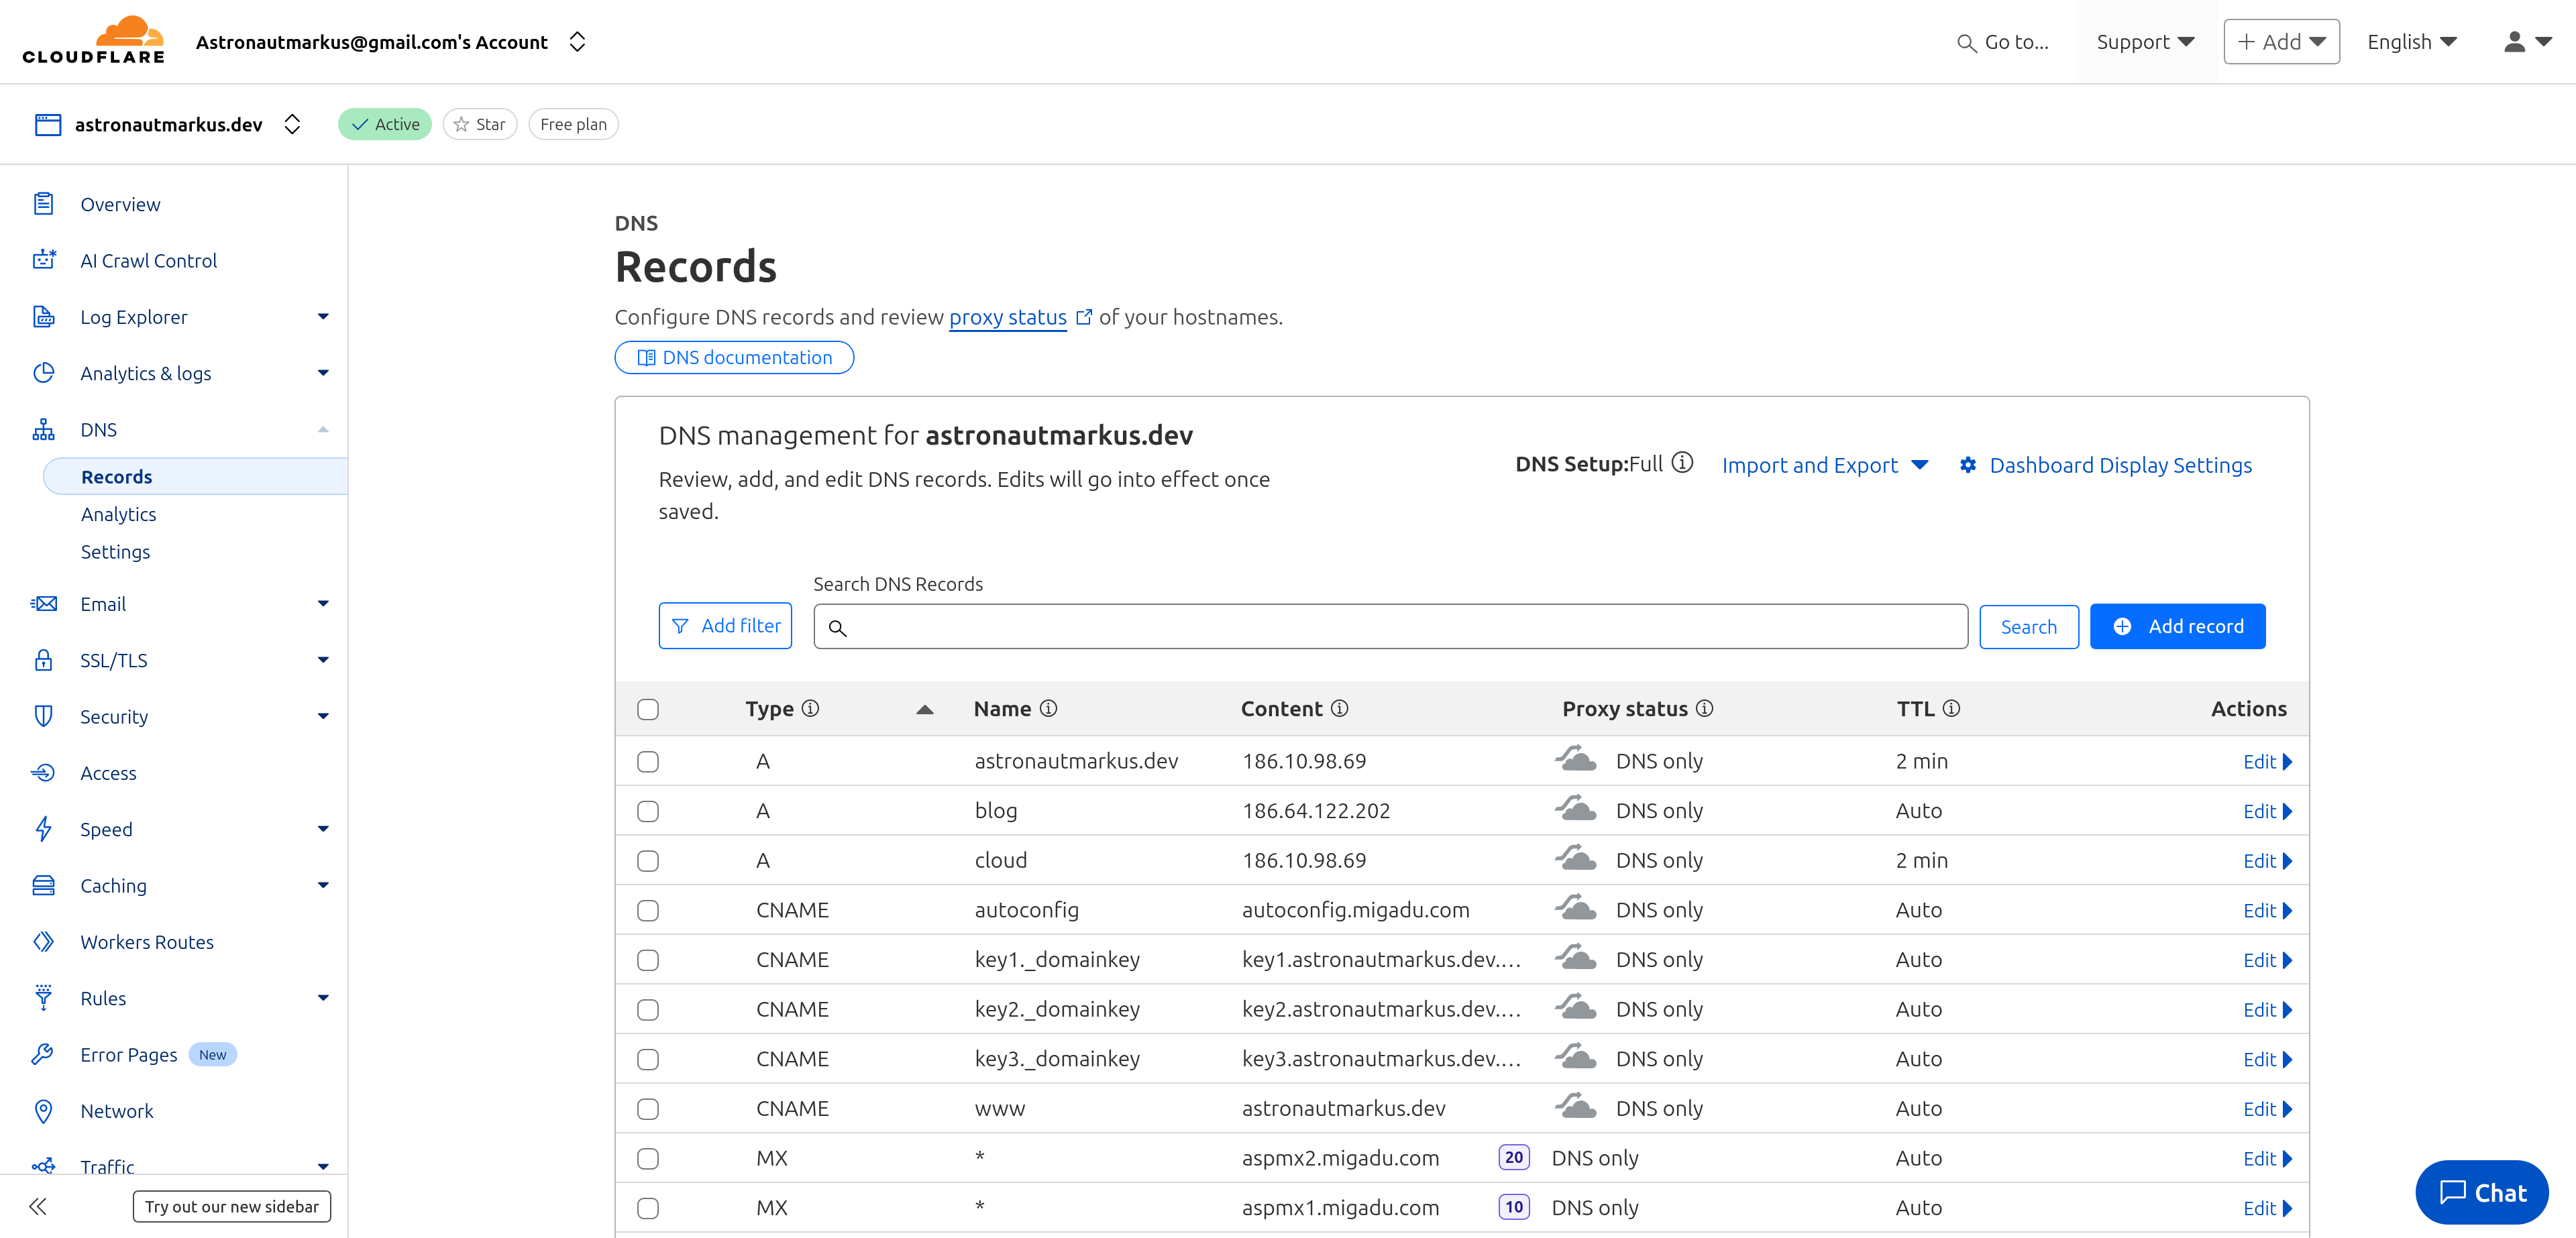
Here you can see that I already have some DNS records configured for my domain astronautmarkus.dev, but you won’t have anything, so you must click on the “Add record” or “Add record” button.
They ask us for some data, like the record type, name, value and TTL.
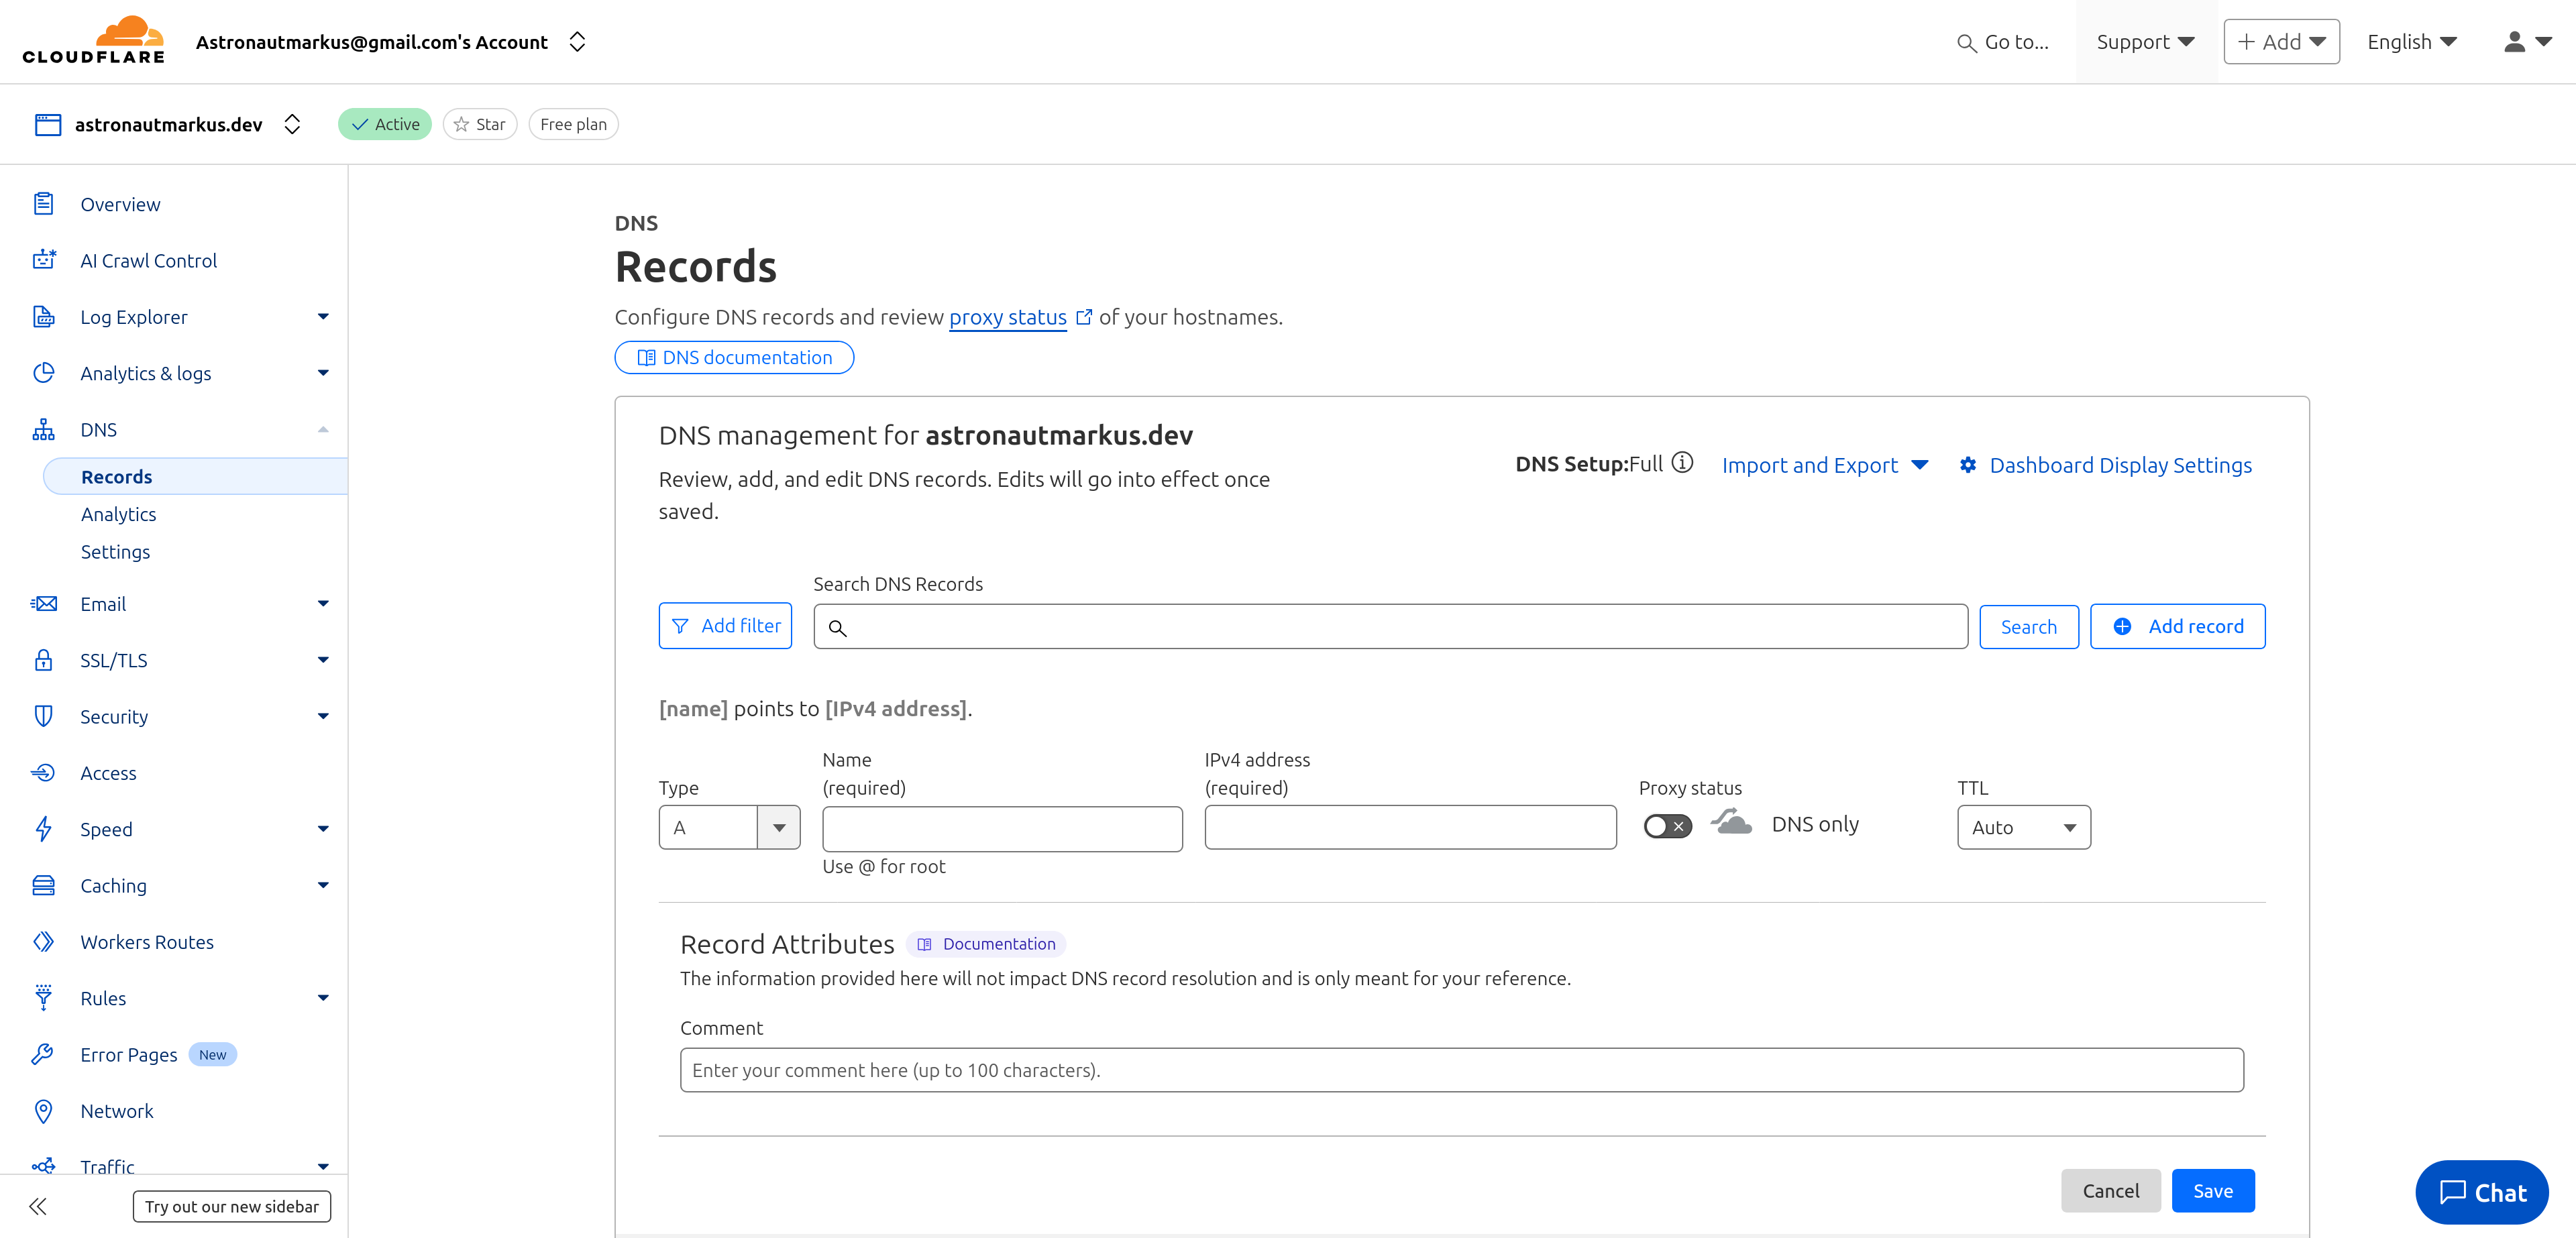
For this example we’re going to add an A record so that our domain points to our web server’s IP address.
- Type: A (this indicates it’s an A record, which points to an IP address)
- Name: @ (this indicates it’s the root domain, that is,
astronautmarkus.dev) - Value: The public IP address of your web server (e.g.:
112.245.172.124). Important: Don’t use private IPs like192.168.x.xor10.x.x.x- it must be the public IP assigned by your ISP or hosting provider. - TTL: Auto (this indicates that the record’s time to live will be automatic, you can leave it like this).
- Proxy status: This setting is fundamental. If you activate Cloudflare’s proxy (orange icon), your web traffic will first pass through Cloudflare, adding DDoS protection, CDN and hiding your server’s real IP. If you deactivate it (gray icon), traffic will go directly to your server. For production sites it’s recommended to activate it for security.
Both have their advantages, if you’re more purist like me, and want all traffic to go directly to your server, without passing through Cloudflare, you can deactivate the proxy, but if you want to take advantage of Cloudflare’s benefits, like DDoS protection and CDN, you can activate the proxy.
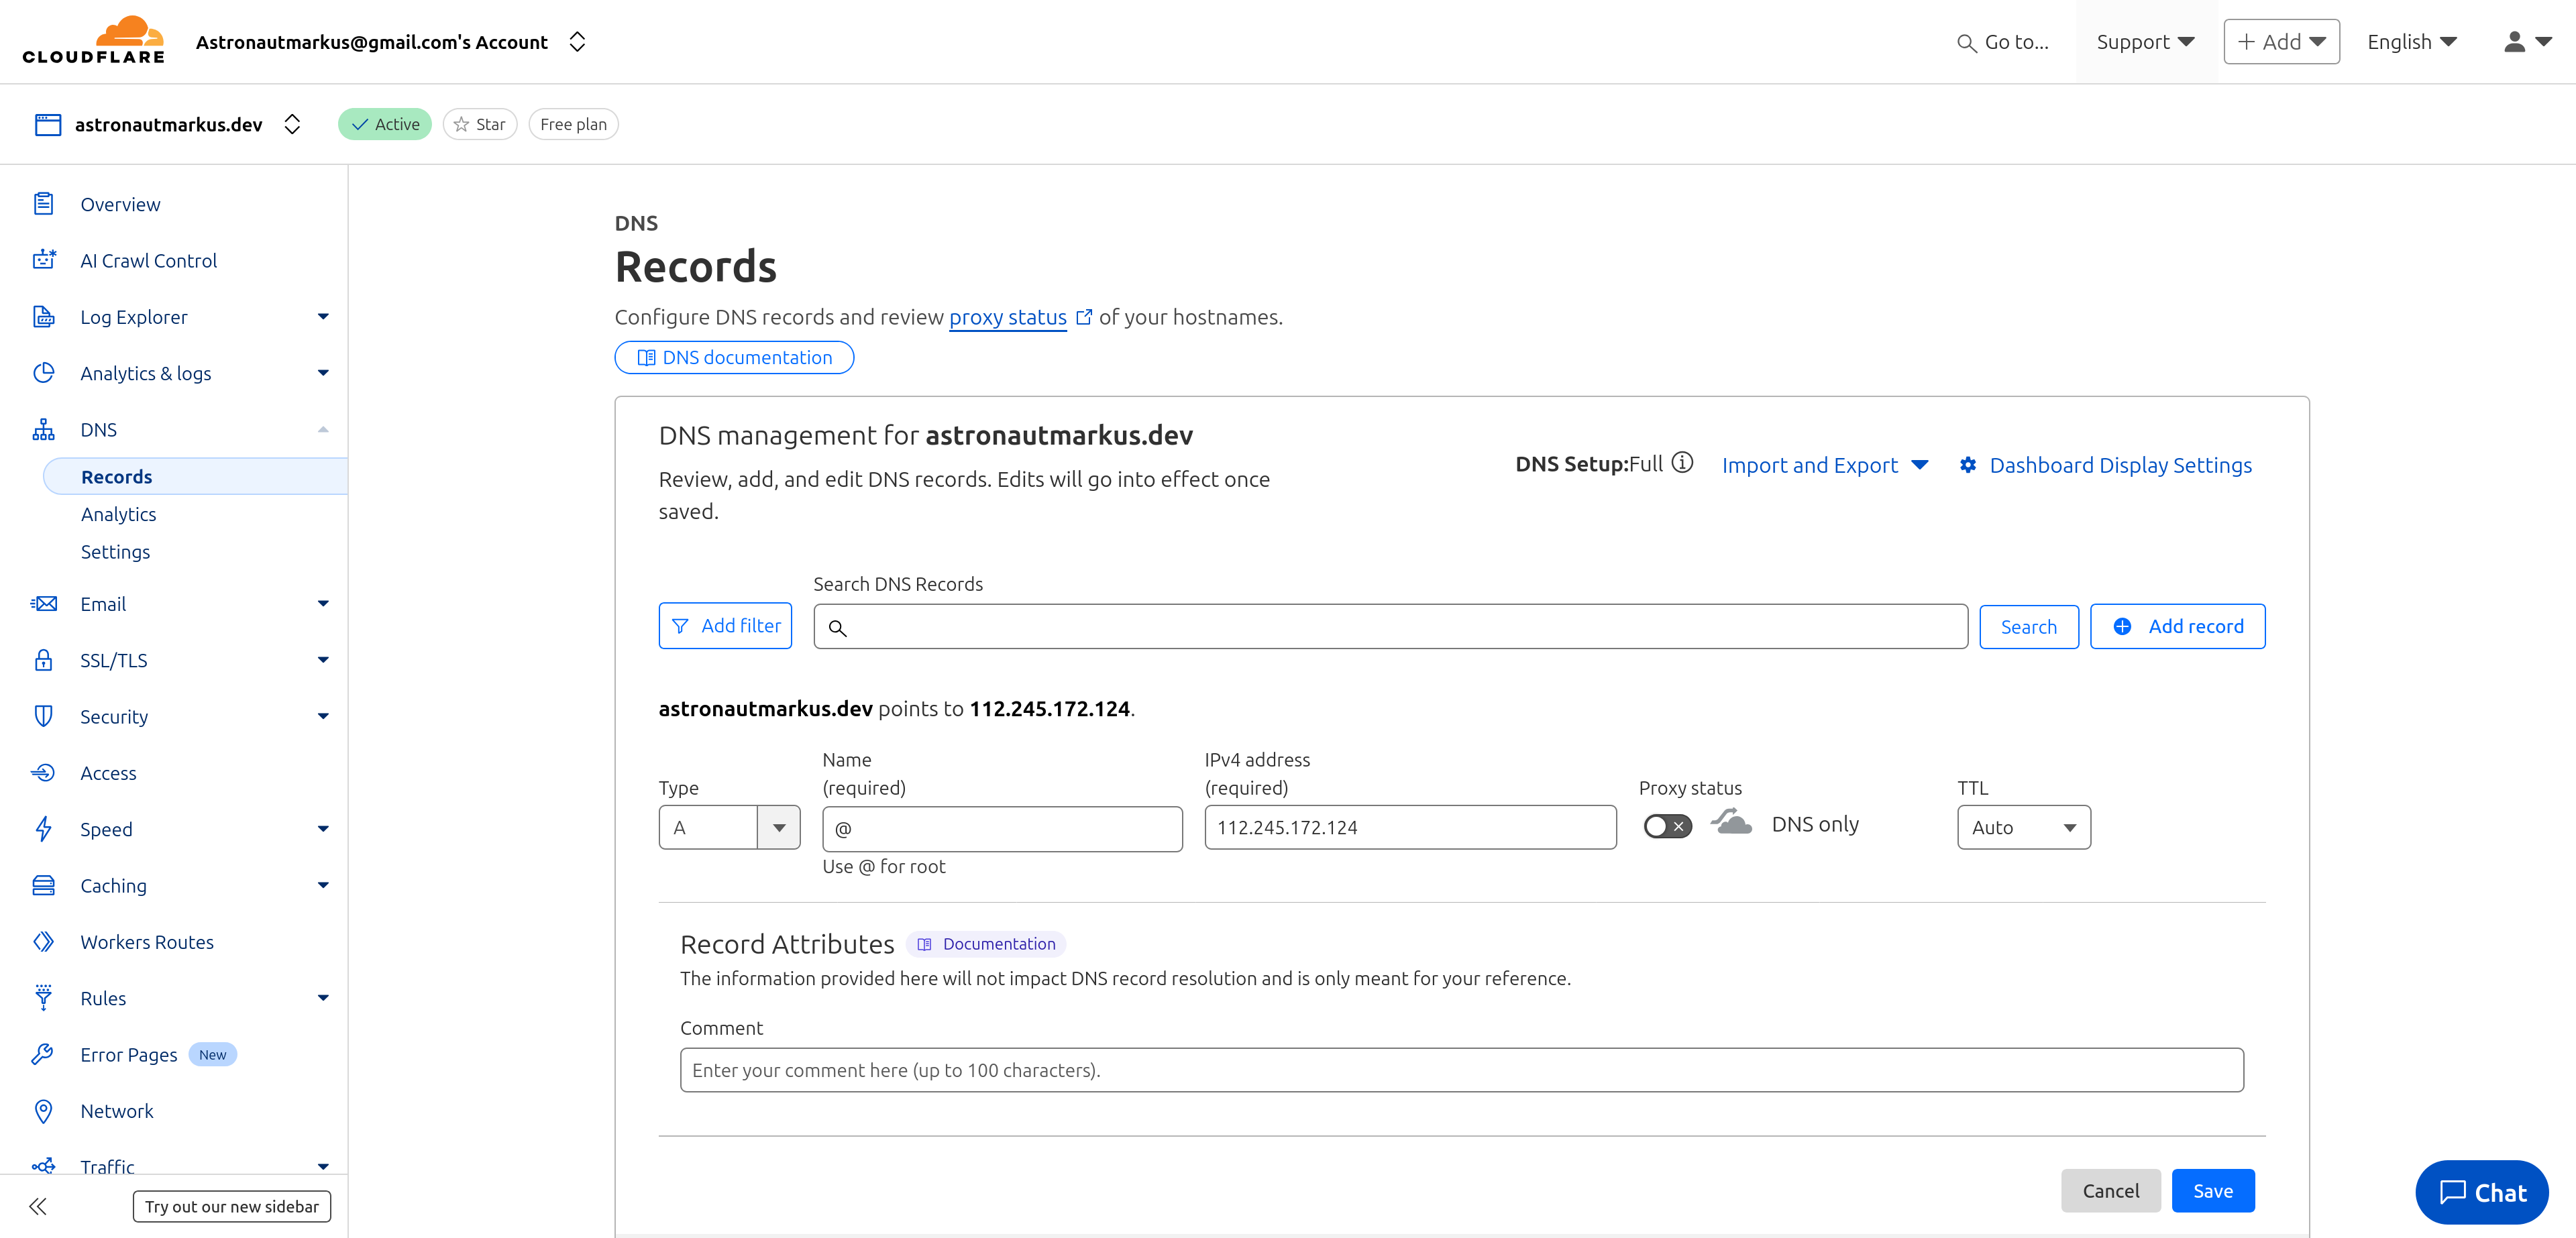
Here I’ve filled in the data for the A record, now we just need to click on “Save” or “Save”.
We now have the domain pointing to our web server, now we can add more DNS records if we want, like CNAME records for subdomains, MX records for email, etc.
Note: You can use different IP addresses at the same time, for example if you have different servers with different IPs, you can use one IP for the main domain, another IP for the API on another server and so, you can also use different domains with the same IP, if there is any doubt.
8.0 Test that the domain works
After adding the DNS records, we must wait another while for these to propagate, there are some online tools to verify if the DNS records have propagated correctly, like DNS Checker or WhatsMyDNS.
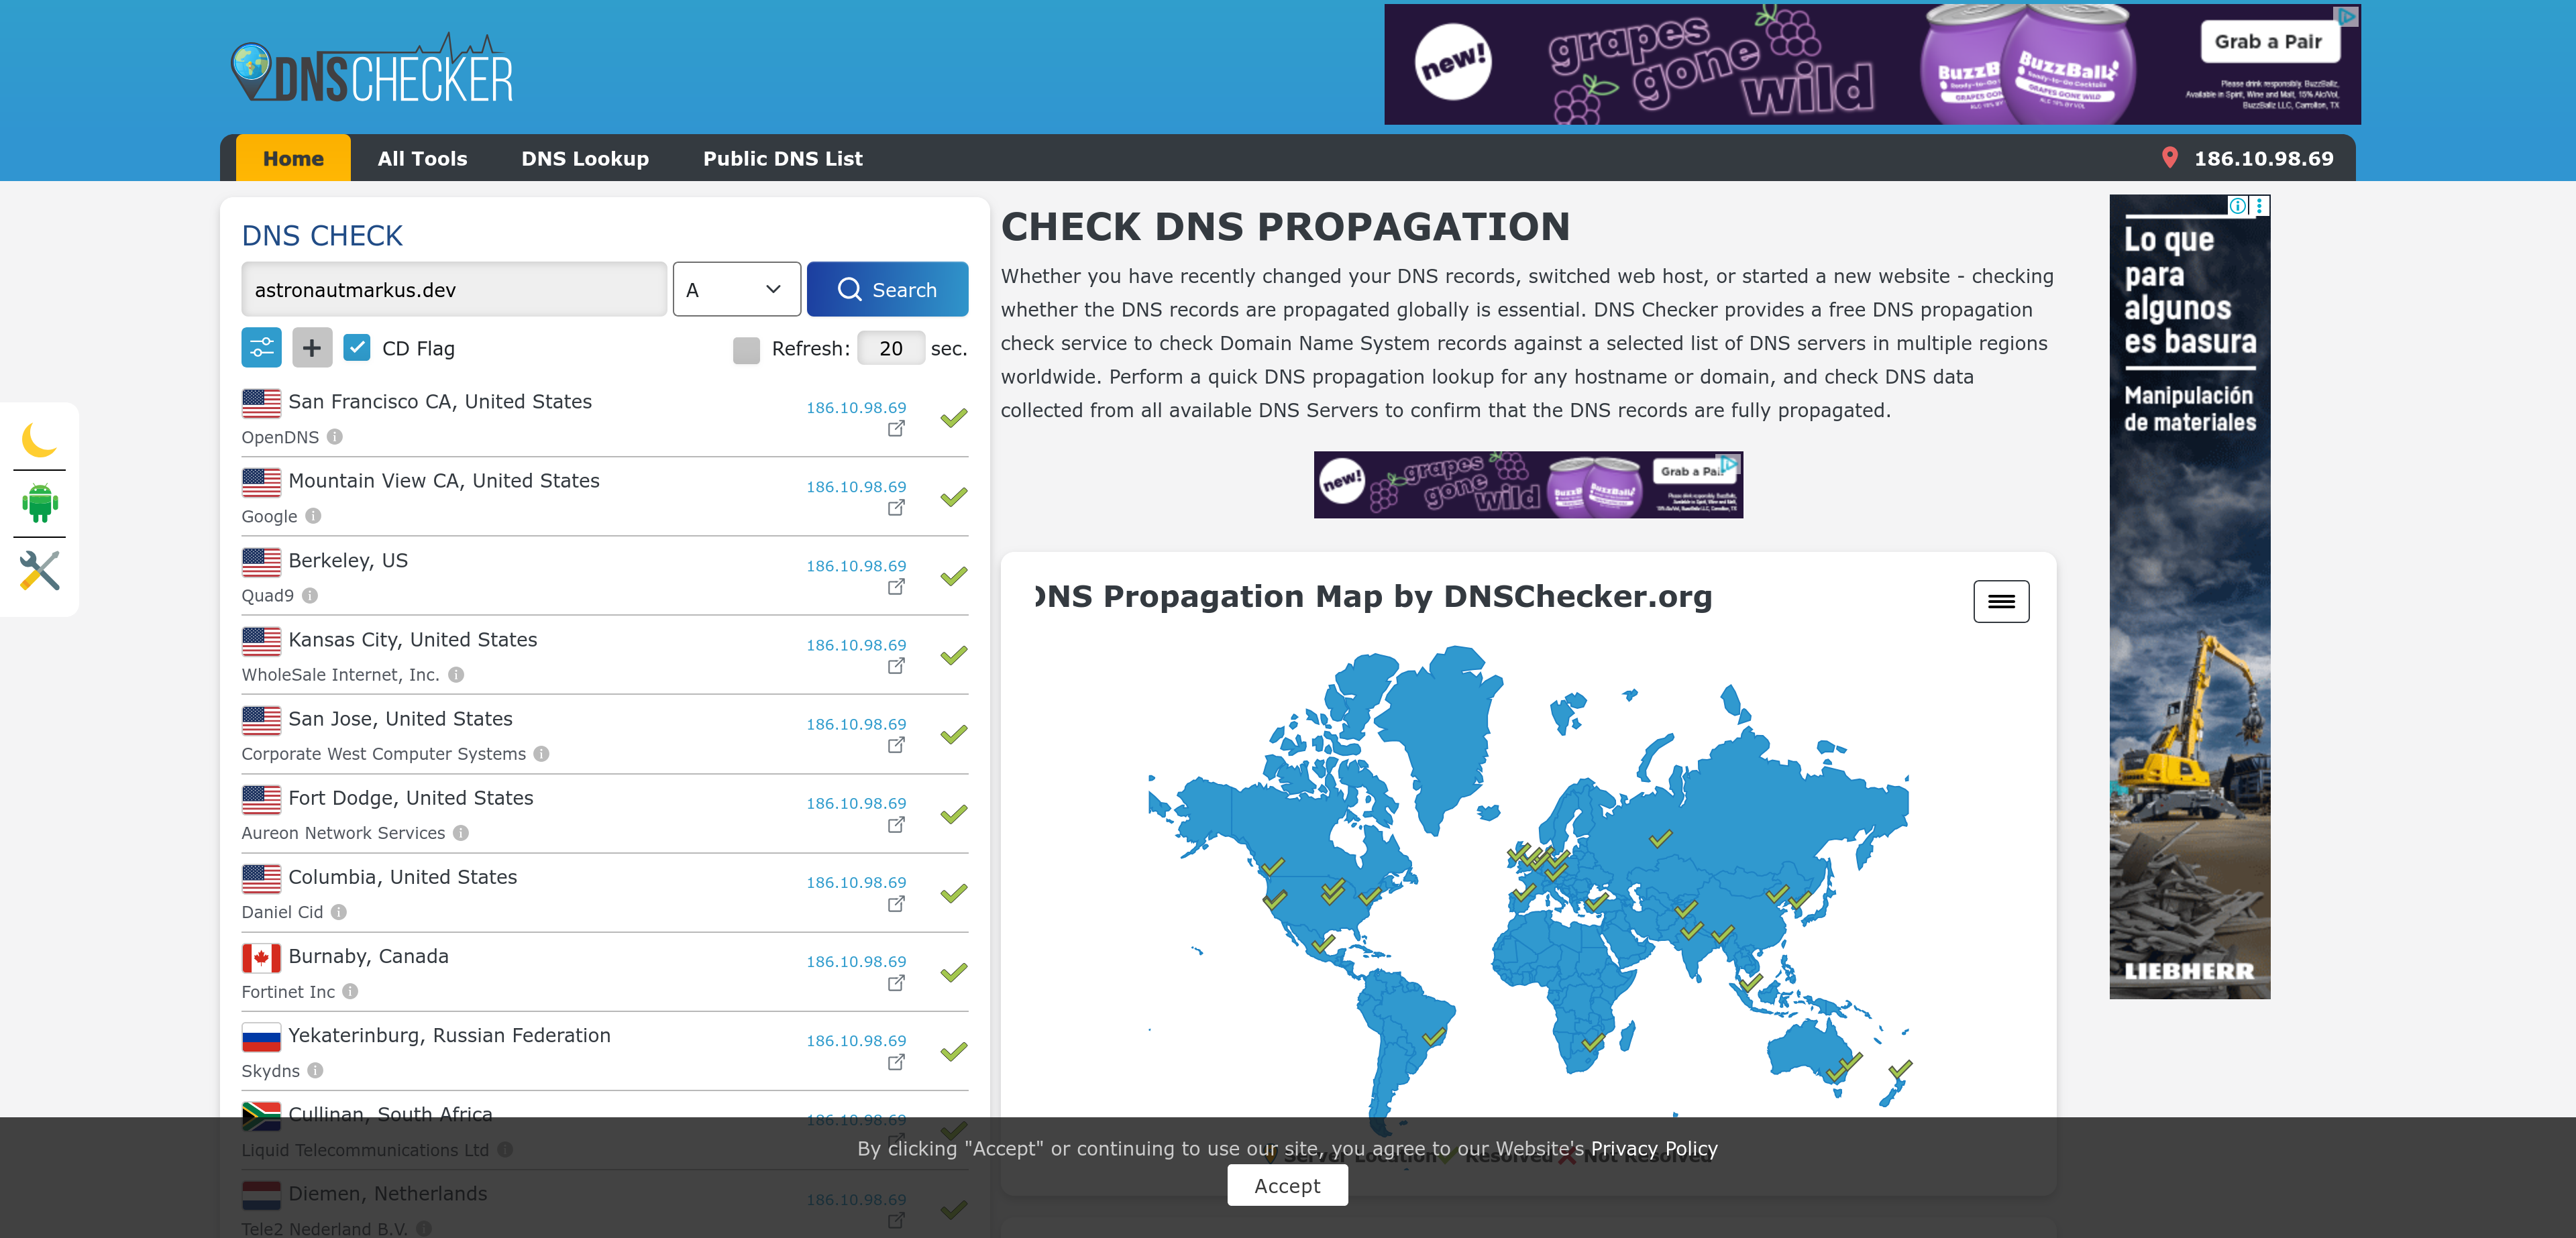
In this photo my domain astronautmarkus.dev is already propagated everywhere, so I can now access my website from anywhere in the world.
And that’s it, now we can access our domain from anywhere in the world and it should take us to our web server.
Of course it should be mentioned that, for the rest to work we must configure our web server, but that’s a topic for a different article, probably if you enter the domain right now, you won’t see anything, because I don’t have any web server configured for this domain, but if you have a web server configured, you should be able to see your website.
Conclusion
In this article we have learned how to link a domain to a DNS server step by step, from acquiring a domain, choosing a DNS provider, changing the nameservers in the domain registrar, adding DNS records and testing that the domain works. All that’s left is to configure the web server to serve our website’s content. I hope this article has been useful to you and that you can apply this knowledge to your own projects. If you have any questions or comments, don’t hesitate to leave them below. Until next time!